Activate experimental feature
The Accordion with nested elements widget is an experimental feature and must be activated. To learn more about activating experimental features, see Elementor Features.
Add the widget to the canvas
- In Elementor Editor, click +.
All available widgets are displayed. - Click or drag the widget to the canvas. For more information, see Add elements to a page.
Accordion with nested elements offers a more advanced and flexible structure, allowing you to nest additional elements within each section. It provides an enhanced way to organize and present content on your website compared to the standard Accordion widget.
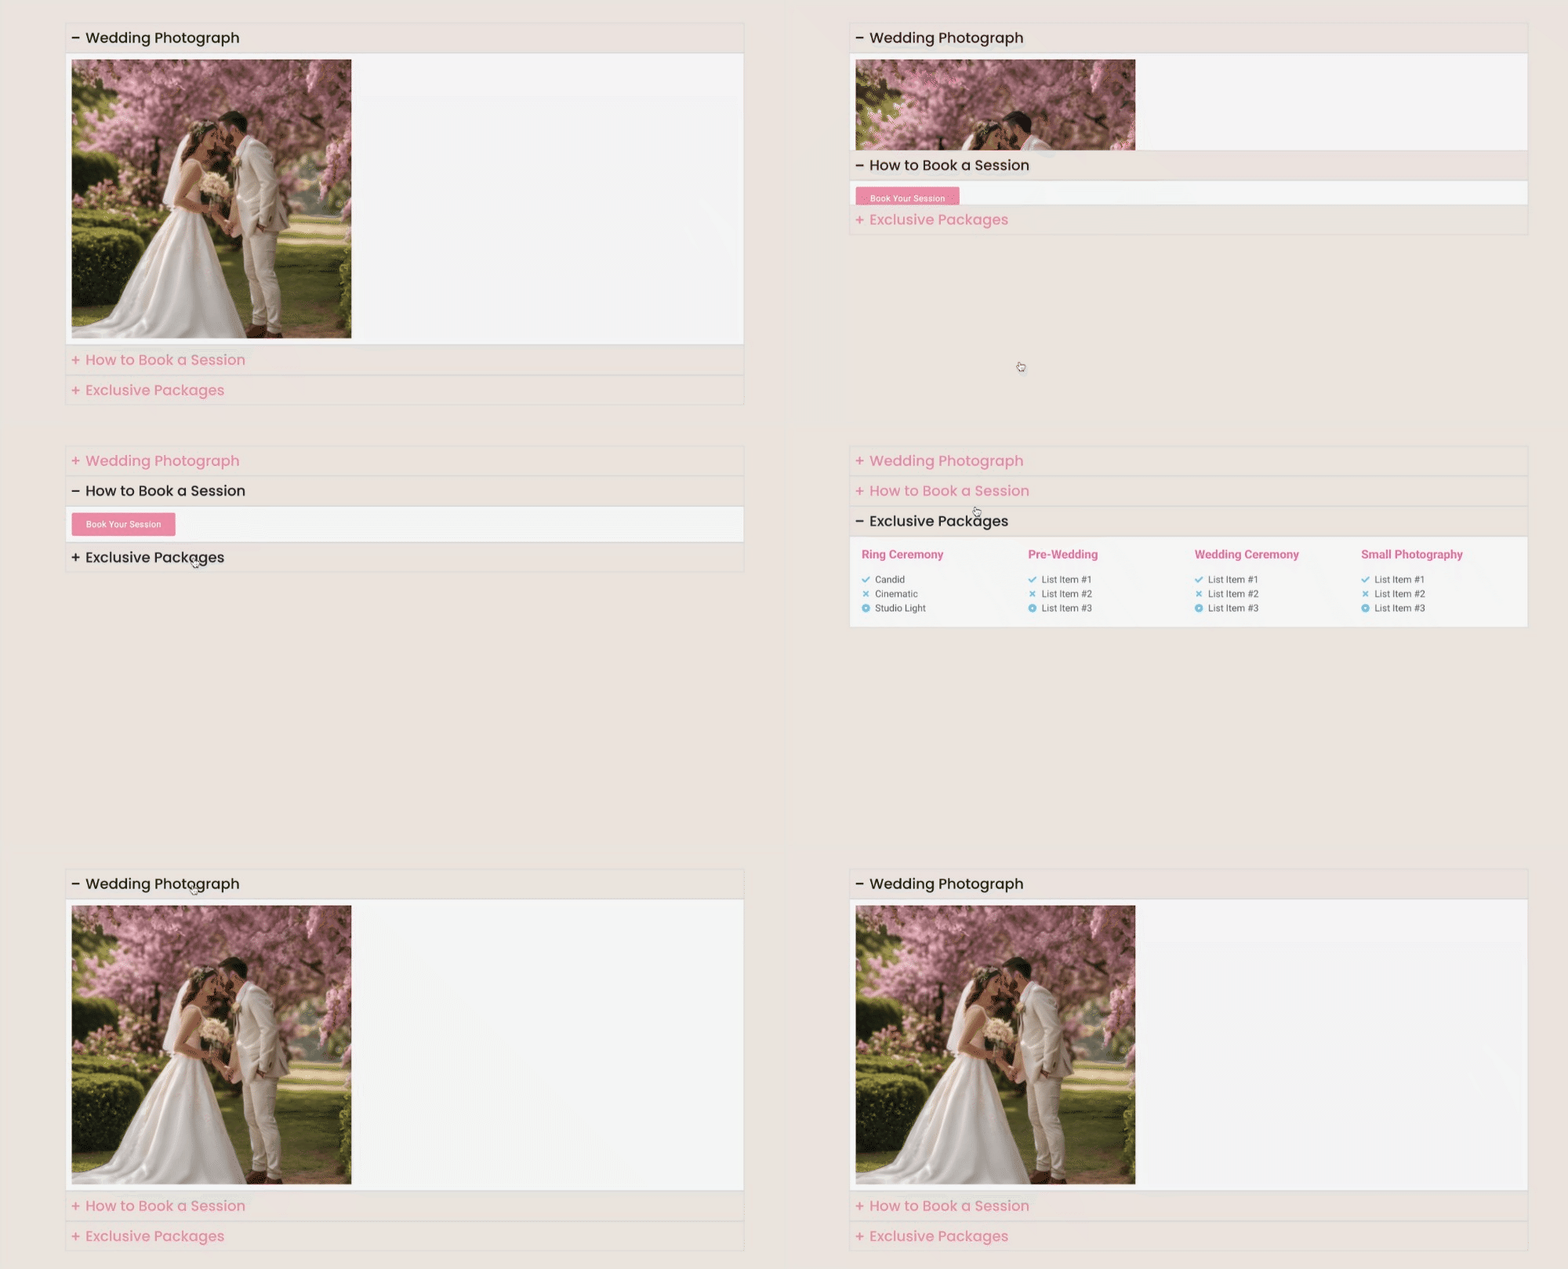
Matt is building a photography website. Rather than creating different pages, Matt wanted to create an interactive section where they showcase their work, make it easy for potential clients to book sessions, and display exclusive photography packages – all necessary details in one section of the website!
To achieve this, they use an accordion widget with nested elements. In the accordion’s nested panels Matt included a portfolio showcase with an attractive image, a booking section with a CTA button, and a display of exclusive packages in list format.
- A nested accordion panel showcasing testimonials and reviews from satisfied clients.
- Restaurant website showcases the menu, reservations, and chef’s specials.
- An E-commerce Website displays product categories, promotions, shipping, and returns.
See a video demonstrating the widget in action.
You can add elements such as images, buttons, or other widgets within each Accordion section, providing more versatility in designing and organizing your content.
The new Accordion widget incorporates the features of the Toggle widget, so the Toggle widget is no longer available.
Create an Accordion with nested elements
- Add the Accordion widget to the canvas. For details, see Add elements to a page.
- By default, the Accordion widget appears with Item #1 expanded on the canvas. Every item has a container already built in. You can add and customize elements to the empty container.
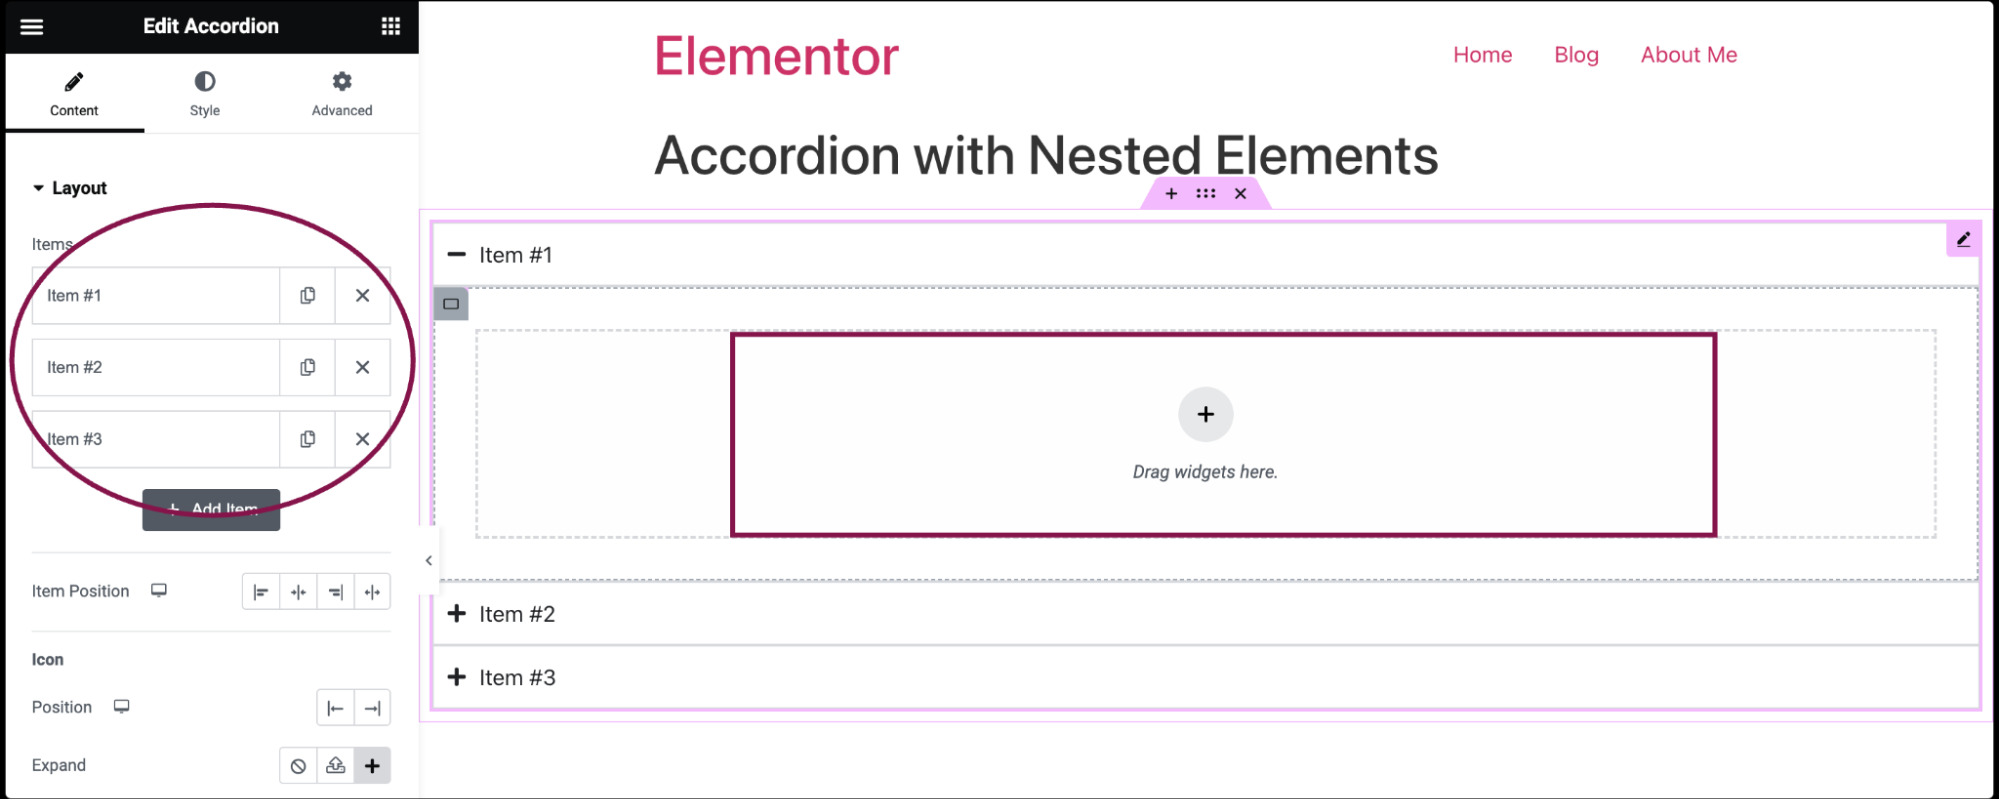
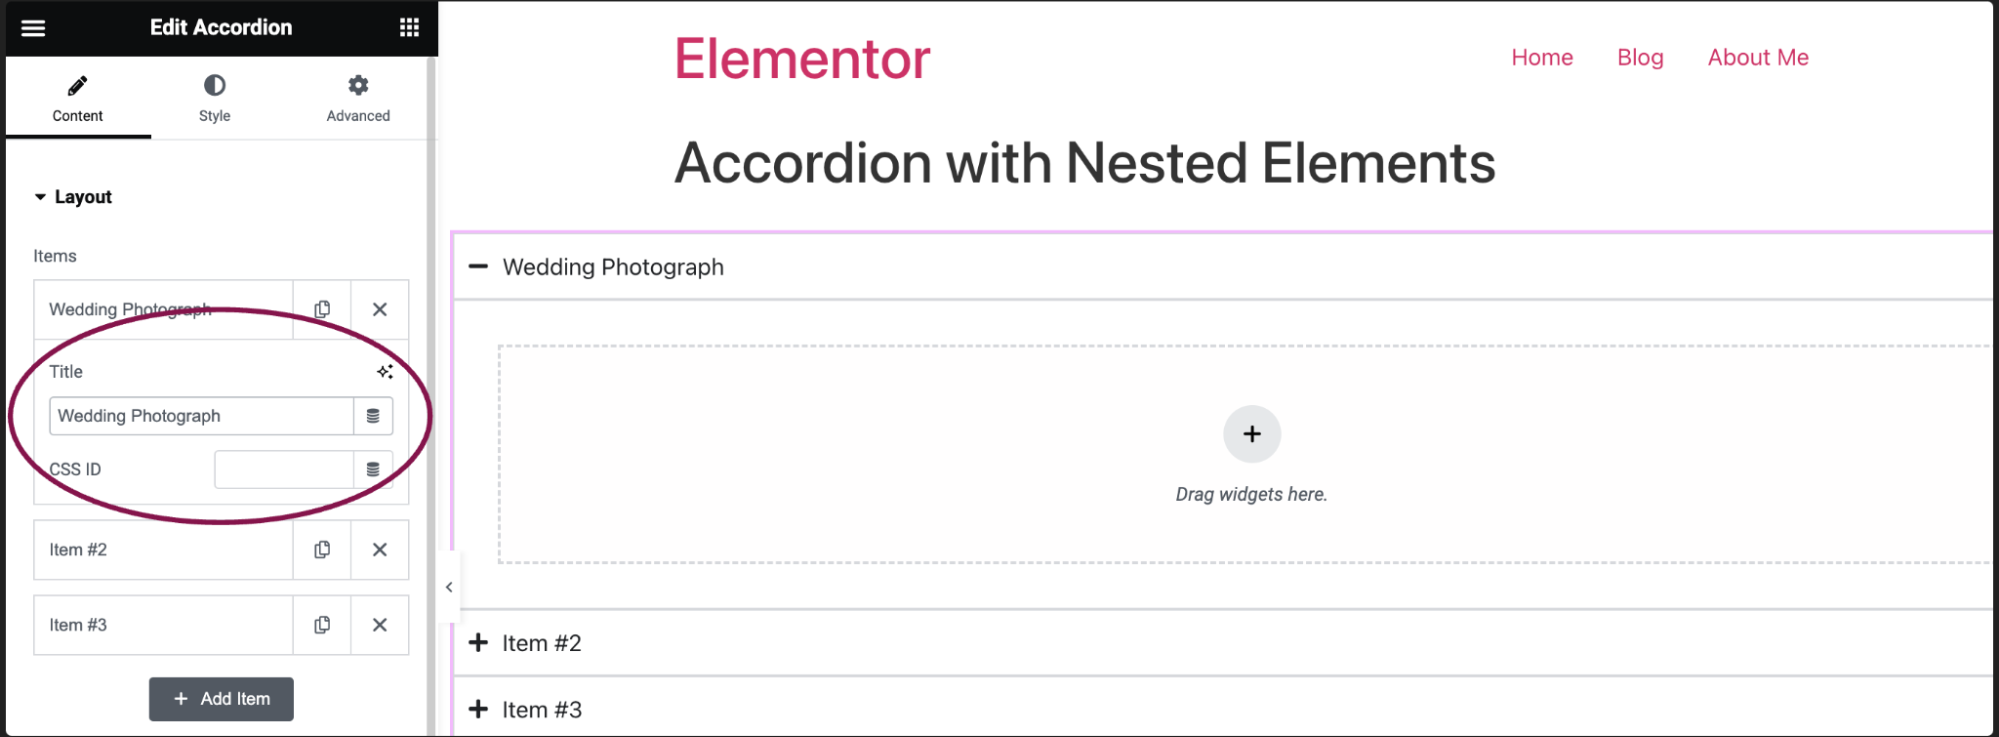
- In the Content tab, under the Layout section, click an item to edit it.
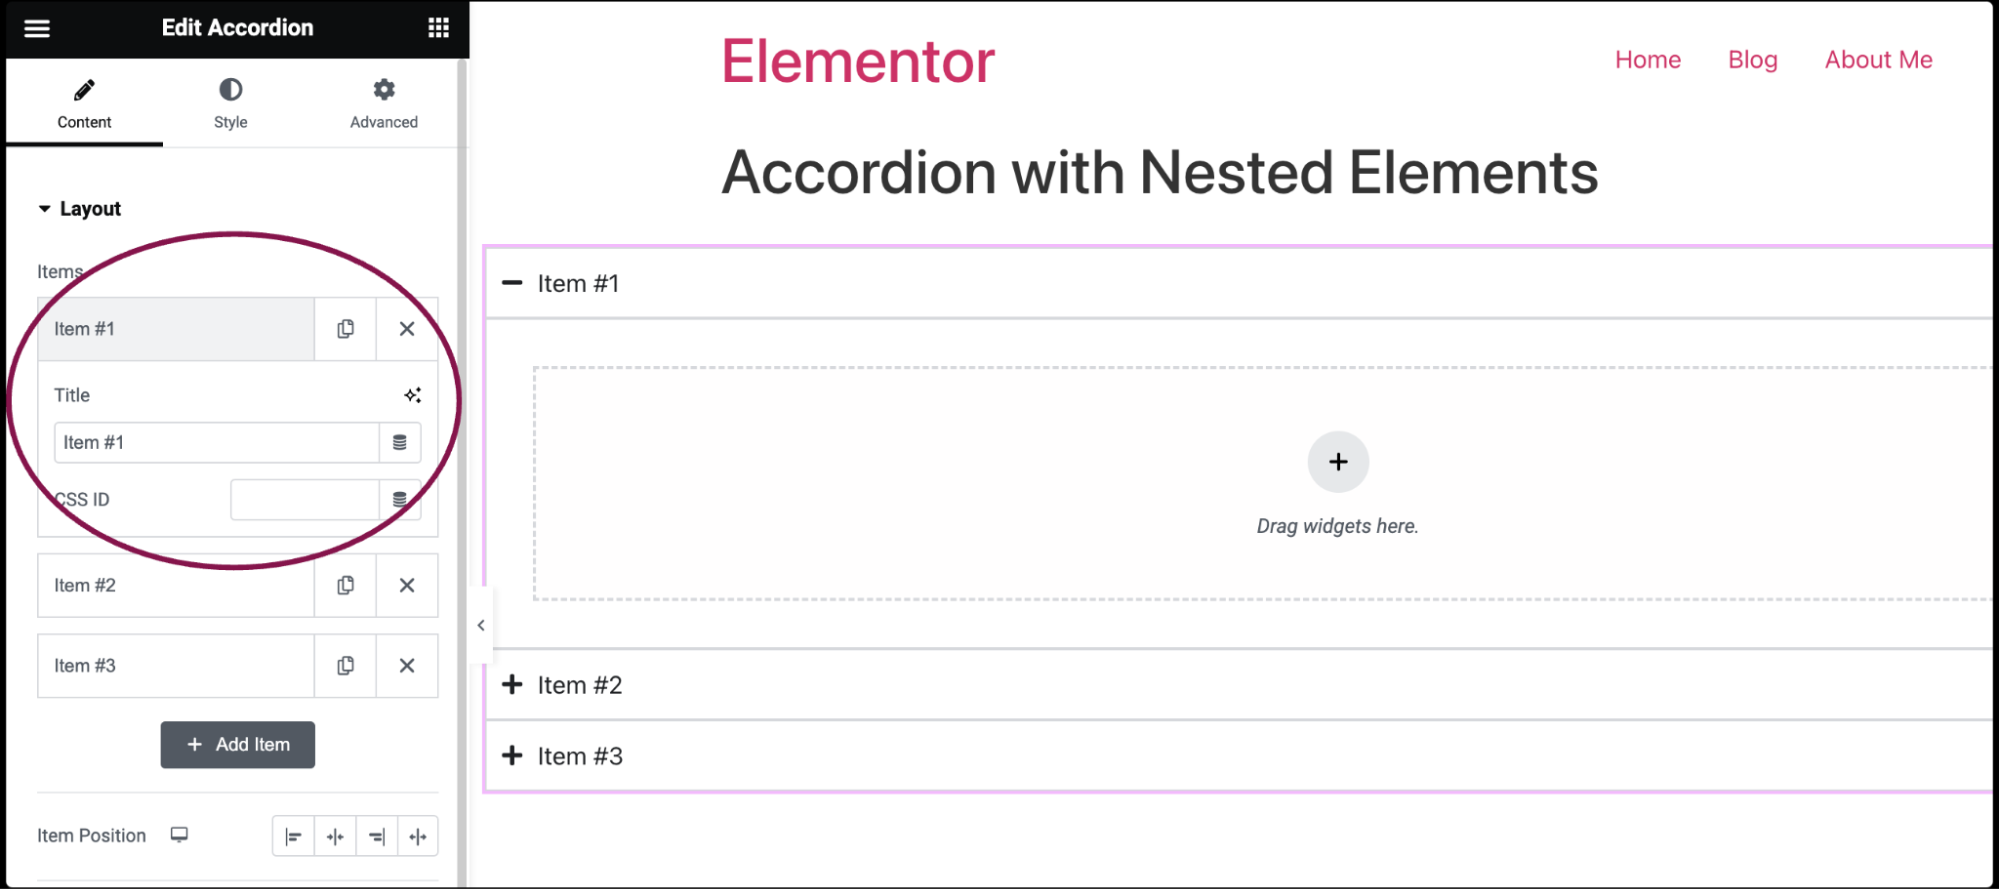
- In the Title field, add the accordion name and give the tab a CSS ID. For more details, see CSS selectors in Elementor.
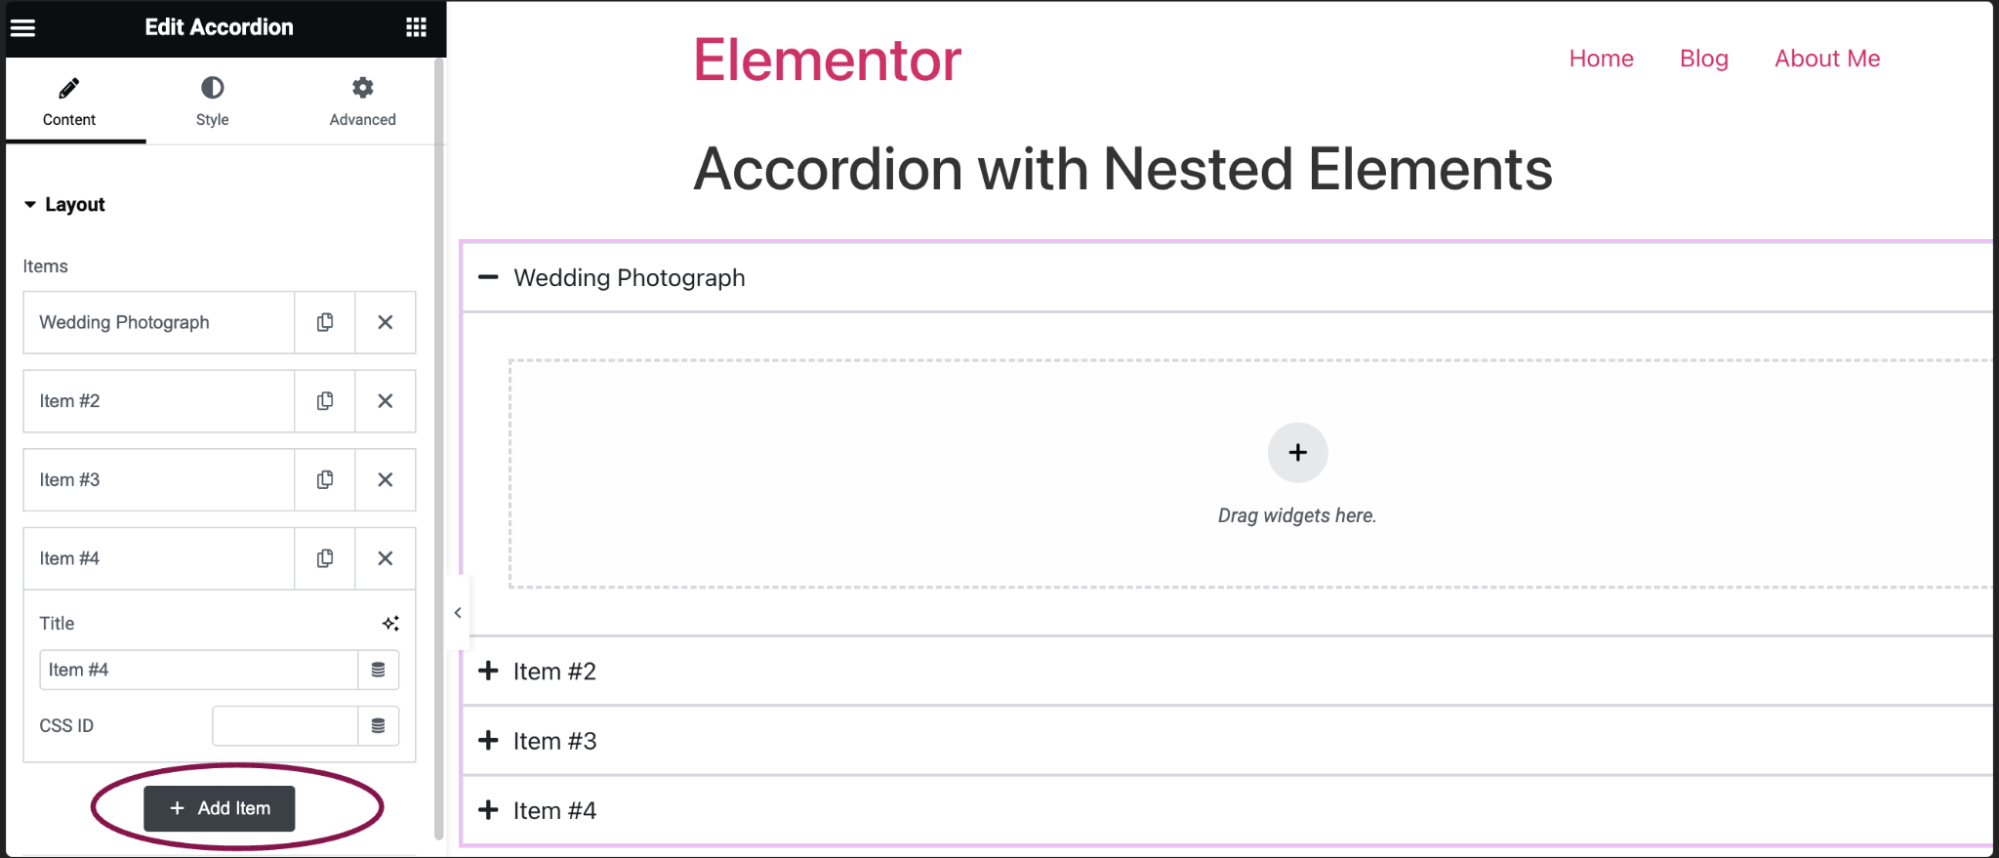
- Click the Add Item button to add a new tab.
You can customize your widgets using content, style, and other advanced parameters, offering you great flexibility in tailoring them to your needs. Click the tabs below to see all the settings available for this widget.
Using the options in the content tab, you can control the layout and content of the accordion.
Items
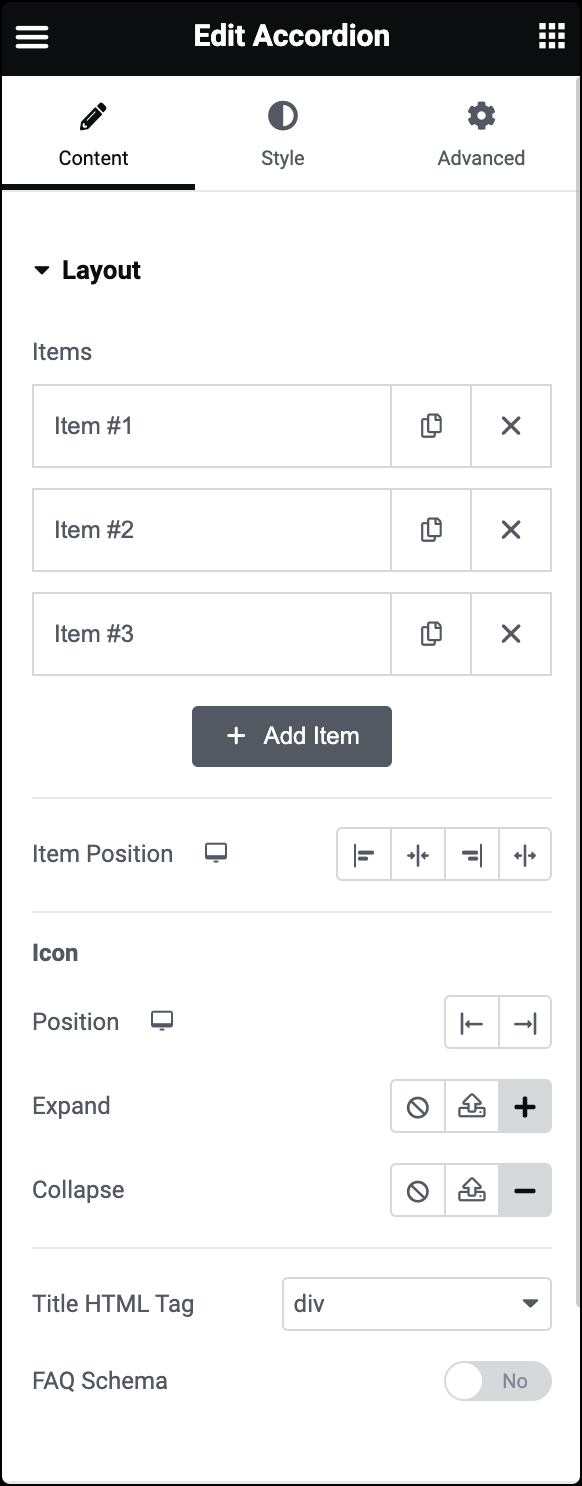
In the Content tab, expand the Layout section to determine the number of tabs and their titles.
Items: Each tab of the Accordion is an item. Click an item to edit it. Editing the item allows you to:
- Title: Change the title.
- CSS ID: Give the tab a CSS ID. For more details, see CSS selectors in Elementor.
- Item Position: Determine where the tab’s name will appear.
Icon
By default, an icon appears next to the tab’s name. Visitors click this icon to expand and collapse the tab.
You further get icon customization options, such as:
- Position: Determine the icon’s place – on the left or right of the tab name.
- Expand: Provides three options for the icon that opens the tab:
 Opt for no icon by selecting the none option.
 Upload your own SVG file as an icon. For more details, see Enable SVG support.
-
 Pick an icon from the icon library.
- Collapse: Provides three options for the icon that opens the tab:
 Opt for no icon by selecting the none option.
 Upload your own SVG file as an icon. For more details, see Enable SVG support.
-
 Pick an icon from the icon library.
Title HTML Tag
Choose the HTML tag for your title. Choices include H1 to H6, Div, Span, or Paragraph.
FAQ Schema
Enable FAQ Schema for SEO benefits.
Tip: FAQ Schema is a special markup that tells search engines that this widget contains an FAQ. Marking an Accordion widget as an FAQ helps boost the visibility of your FAQs. It’s important only to mark one Accordion widget per page as an FAQ.
Default State
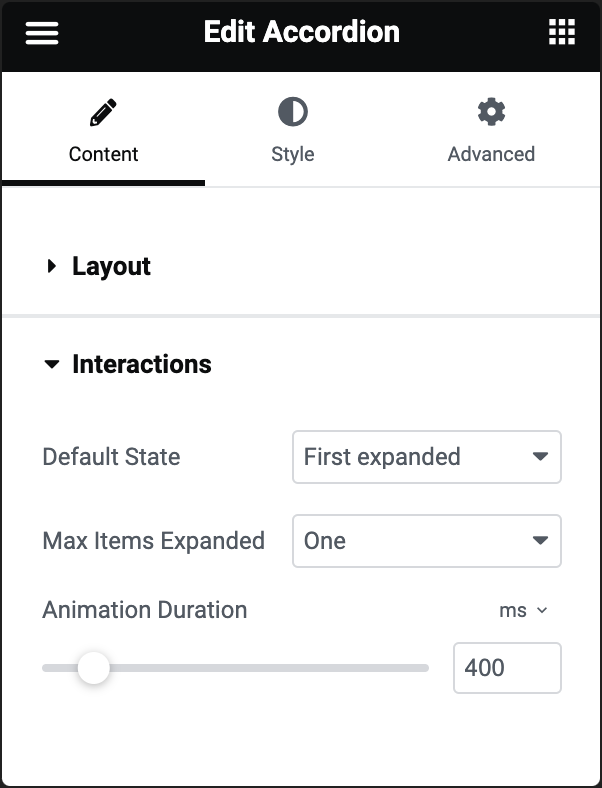
Determines how the Accordion appears by default:
- First expanded – The first item is expanded .
- All collapsed – No items are expanded.
Max Items Expanded
Determines how many tabs can be opened simultaneously.
- One – Single tab can be opened at a time.
- Multiple – Unlimited number of tabs can be opened simultaneously.
Animation Duration
Adjust animation duration for opening and closing tabs.
In the Style tab, you can control the overall style of the accordion.
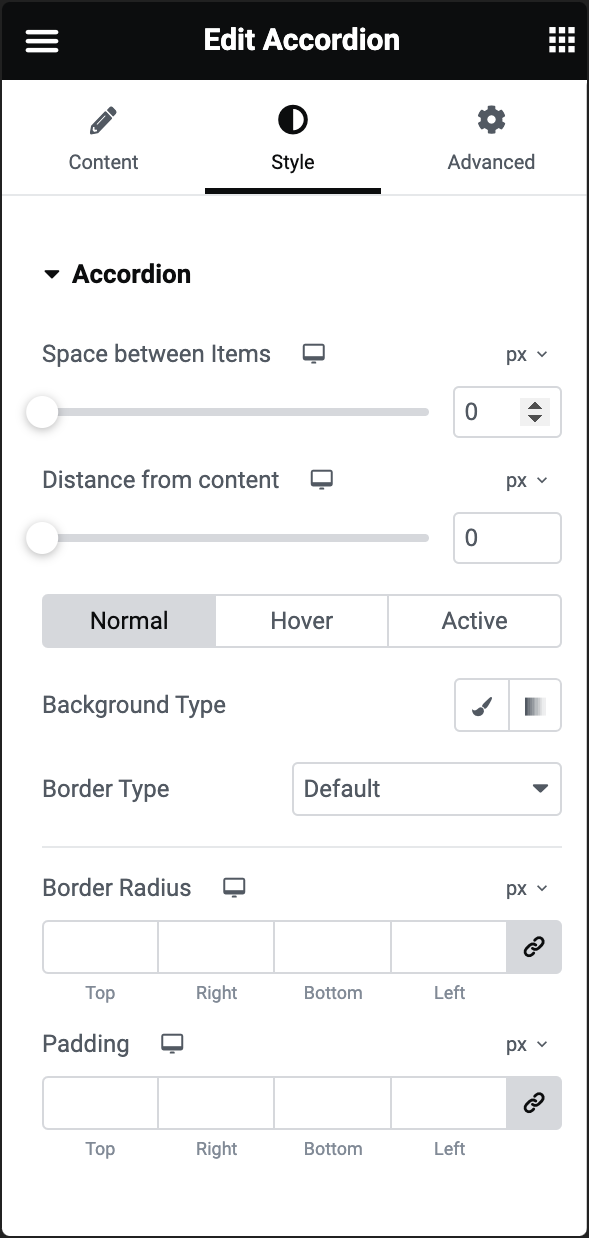
Space between Items
Use the slider to increase and decrease the amount of space between tabs.
Distance from content
Use the slider to increase and decrease the space between the tab title and elements in the tab.
Background Type
Choose the background. For more details, see Create a Background.
Border Type
Choose the border type. For more details, see Border type.
You get three styles to choose for:
- Normal – The default style.
- Hover – The style when users mouse over the tab.
- Active – The style when the tab is open.
Border Radius
Choose the border radius. For more details, see Border radius tools.
Padding
Set the inner spacing between the content’s edge and the accordion’s edge. Learn how to create space with padding and margins.
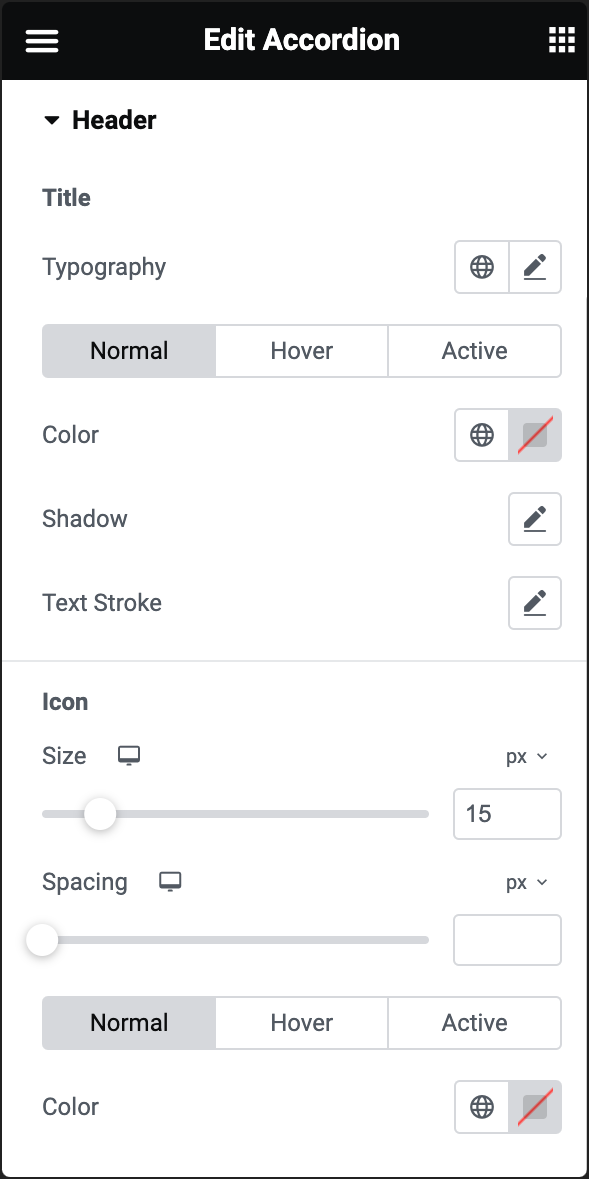
Title
- Customize the font style, size, and other typography settings for your title. For more details, see Typography.
The headers can have three different styles:- Normal – The default style.
- Hover – The style when users mouse over the tab.
- Active – The style when the tab is open.
- Color: Choose a color: either use the color picker or a global color.
- Shadow: Click the 🖋️ icon to add a shadow to the title. Learn more about shadows.
- Text Stroke: Click the 🖋️ icon to apply a stroke effect to the title. Learn more about Text Stroke.
Icon
- Size: Use the slider to determine the size of the icon next to the tab title. For more details, see Units of measurement.
- Spacing: Use the slider to determine the amount of room between the tabs’ title and the icon.
- Color: Choose an icon color: either use the color picker or a global color.
You get three styles to choose for:- Normal – The default style.
- Hover – The style when users mouse over the tab.
- Active – The style when the tab is open.
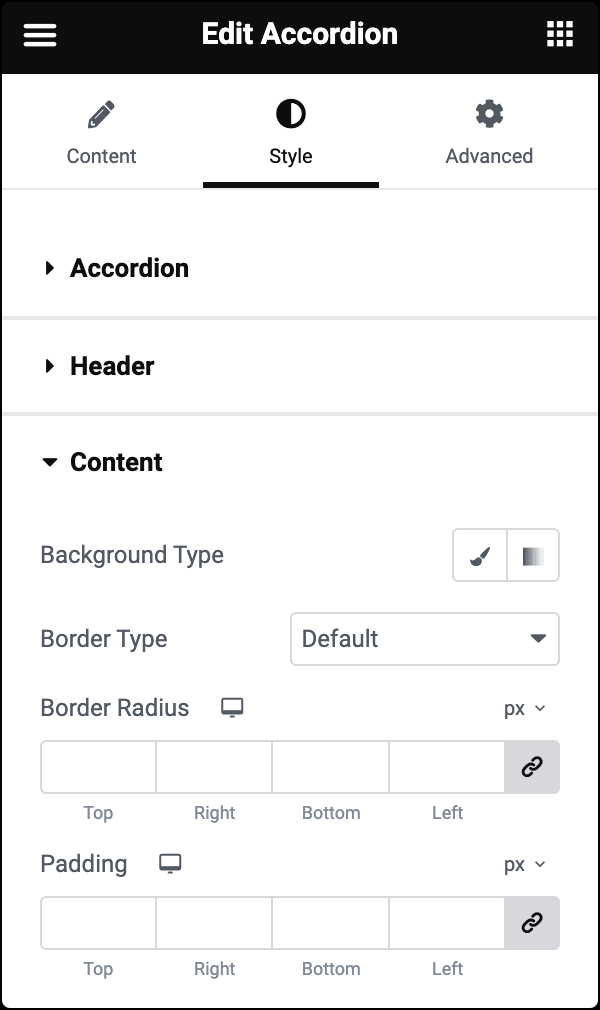
Background Type
Choose the background. For more details, see Create a Background.
Border Type
Choose the border type. For more details, see Border type.
Border Radius
Choose the border radius. For more details, see Border radius tools.
Padding
Set the inner spacing between the content’s edge and the individual accordion’s edge. Learn how to create space with padding and margins.
The Advanced tab provides options to control the widget position, adjust the spacing, add custom code, and more.
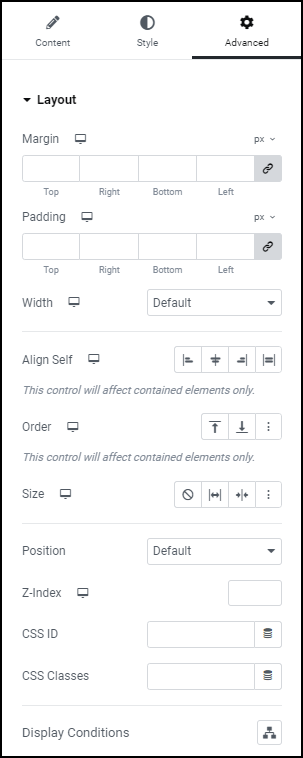
Advanced
Learn more about the Advanced tab settings.