- Flexbox Containers
- Nested Elements

Add the widget to the canvas
To access and use a widget:
In Elementor Editor, click +.
All available widgets are displayed.Click or drag the widget to the canvas. For more information, see Add elements to a page.
Carousels are effective tools for displaying multiple pieces of content, such as images, text, or other elements, in a single, compact space on your webpage.
The Carousel widget allows you to use nested elements within the carousel items. This means you can design and structure each item within the carousel with different elements, allowing for a unique and customized presentation.
Also, the widget gives you the flexibility to create carousels that match your specific needs and preferences. You can use a combination of images, text, buttons, or any other Elementor elements to create a carousel that suits your website’s style and content.
See a video demonstrating the widget in action.
Emily is creating an online furniture store. On the hero section of the website, they used the carousel to highlight different aspects of their business.
They created a nested elements layout where, in the first carousel item, they added images showcasing a stylish living room furniture set, capturing visitors’ attention with a visually appealing display of their products.
In the second carousel, they added customer testimonials with titles, customer images, star ratings, and reviews to provide social proof of product satisfaction.
The third carousel item includes a Call-to-Action (CTA) button labeled Shop Now. When visitors click on it, they’re directed to the main product catalog or a specific category page, encouraging them to explore your furniture collection further.
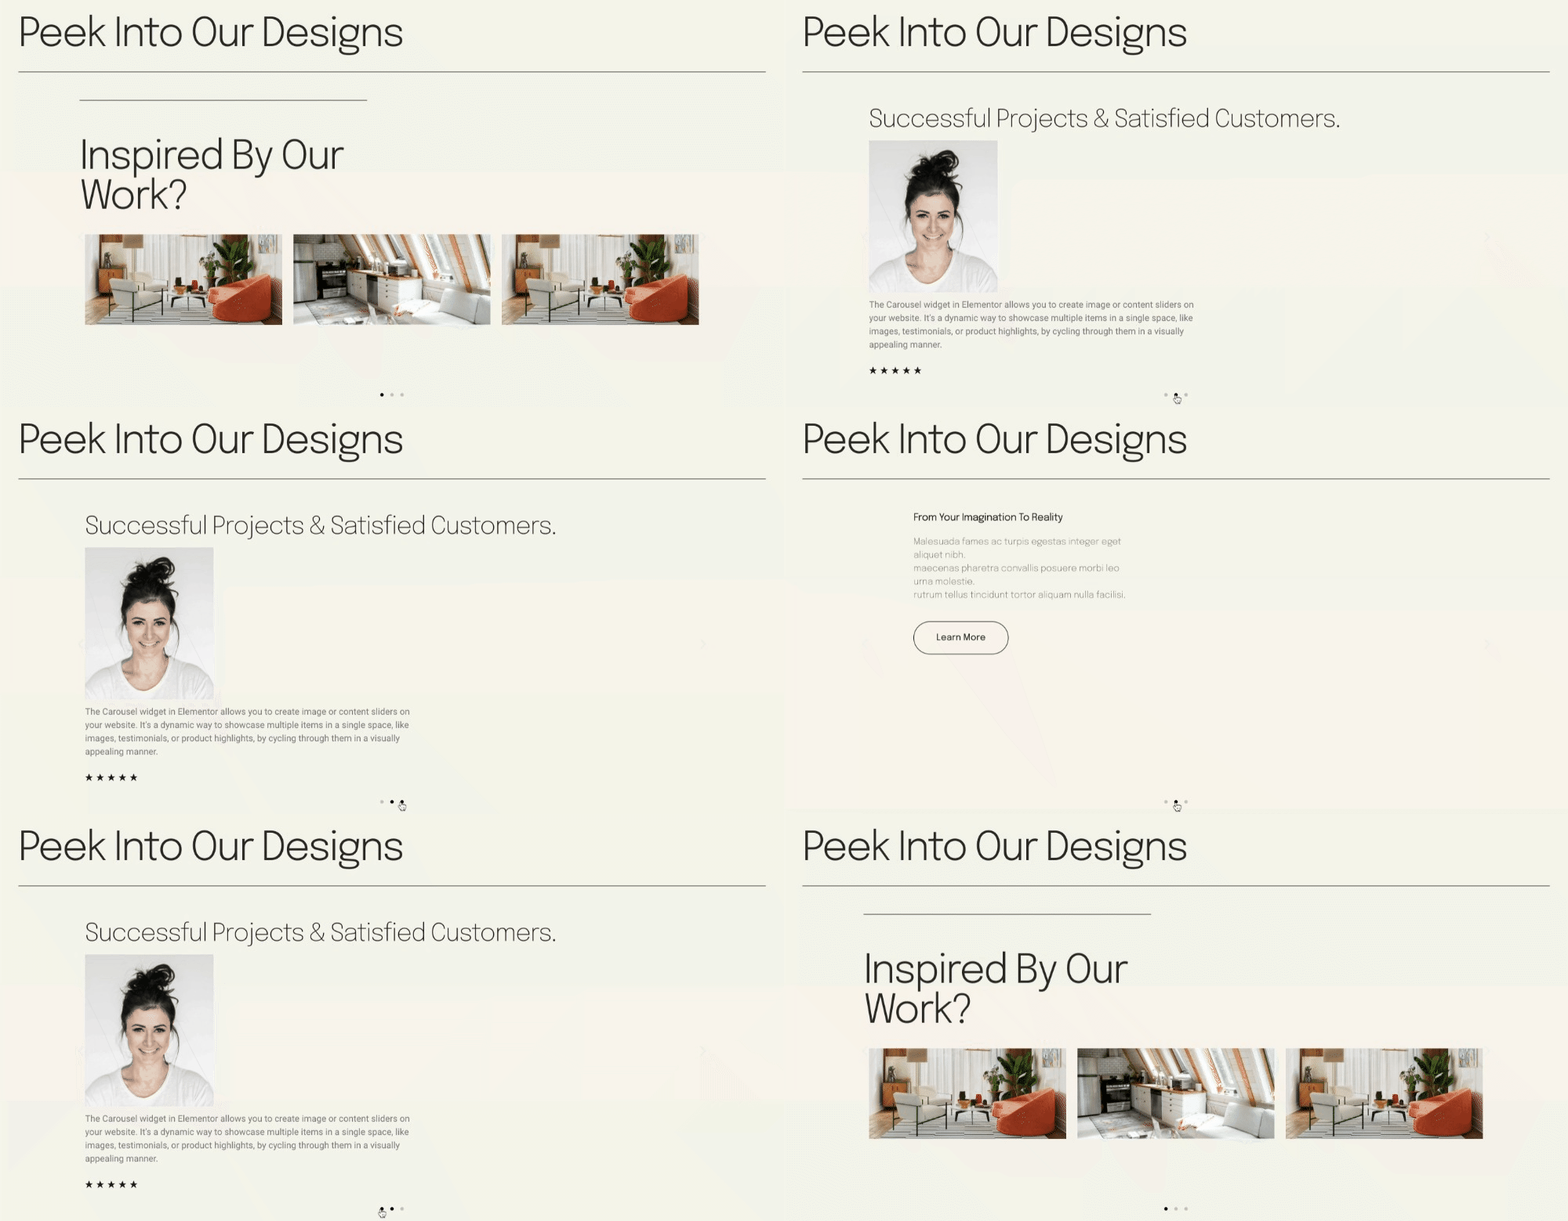
- Present different course topics or modules in an educational platform with a scrolling carousel.
- Display key features of multiple products in a single rotating carousel.
- Highlight different event details sequentially using the carousel widget.
Add Carousel widget: Step-by-step
- Add the Carousel widget to the canvas. For details, see Add elements to a page.
- By default, the carousel widget comes with three slides. Each slide has one container. You can add elements to these containers to build your own carousel. Learn how to work with containers.
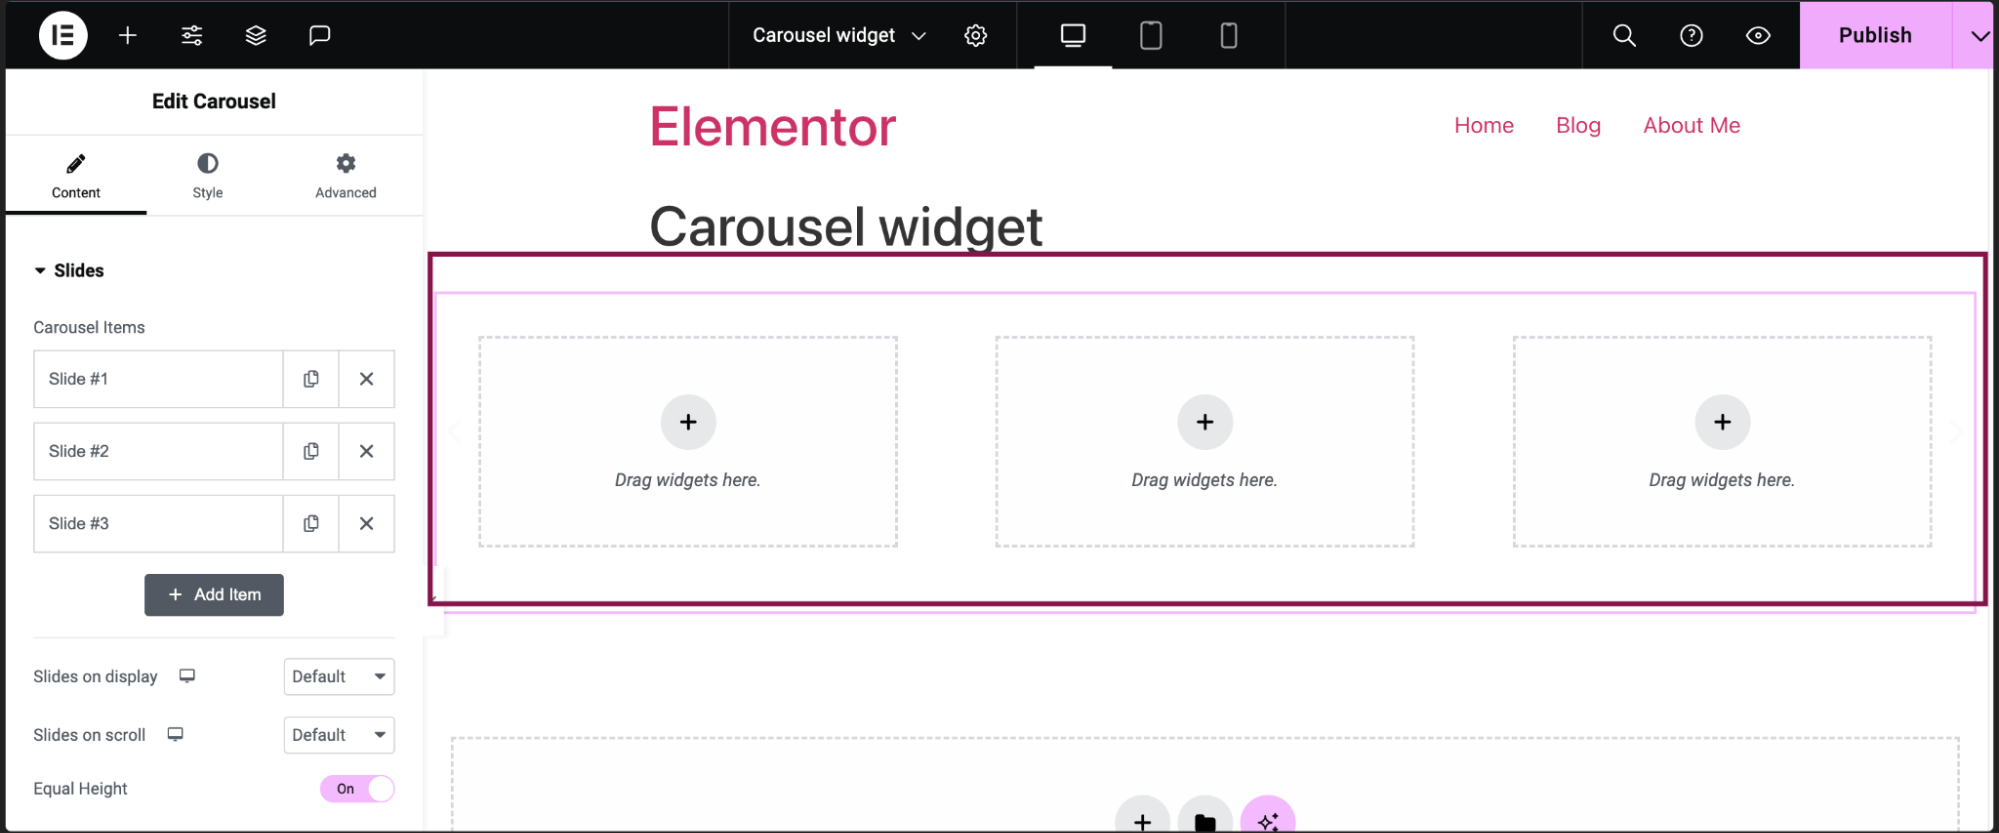
Note: Do not add a carousel inside a carousel, as it may affect the functionality. - You can also add or delete these default slides.
- To add a new slide, in the Content tab, under the Slides section, click the Add Item button. You can also create the exact copy of the existing slide by clicking the
 icon.
icon.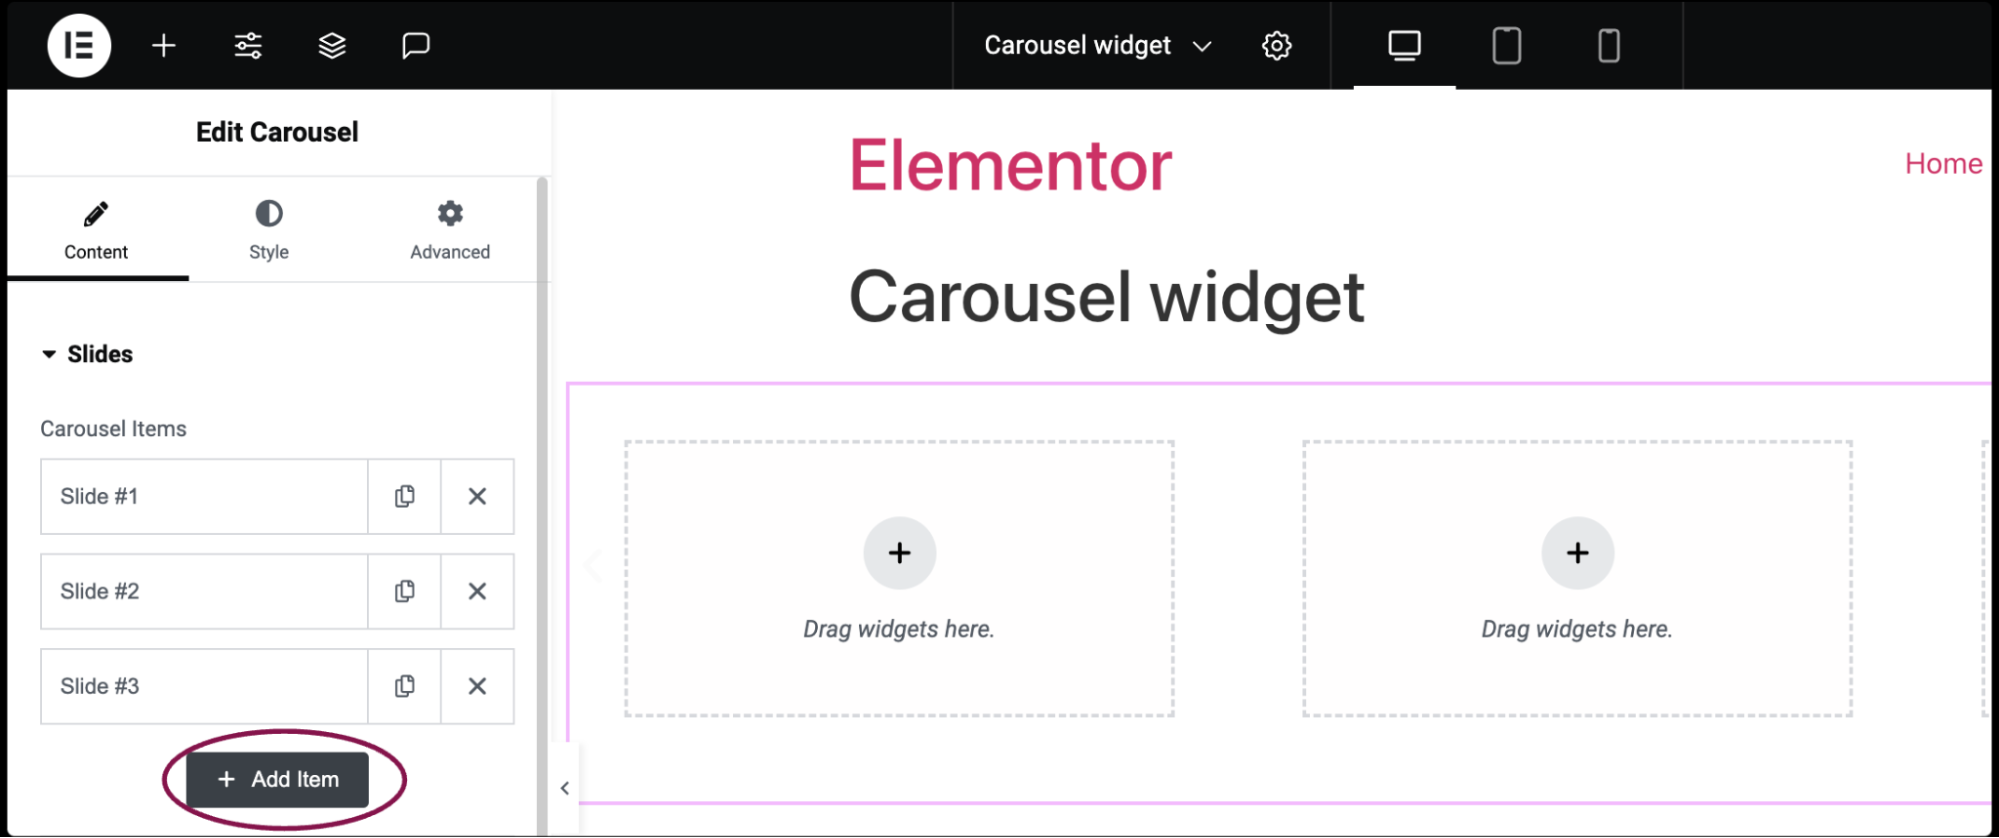
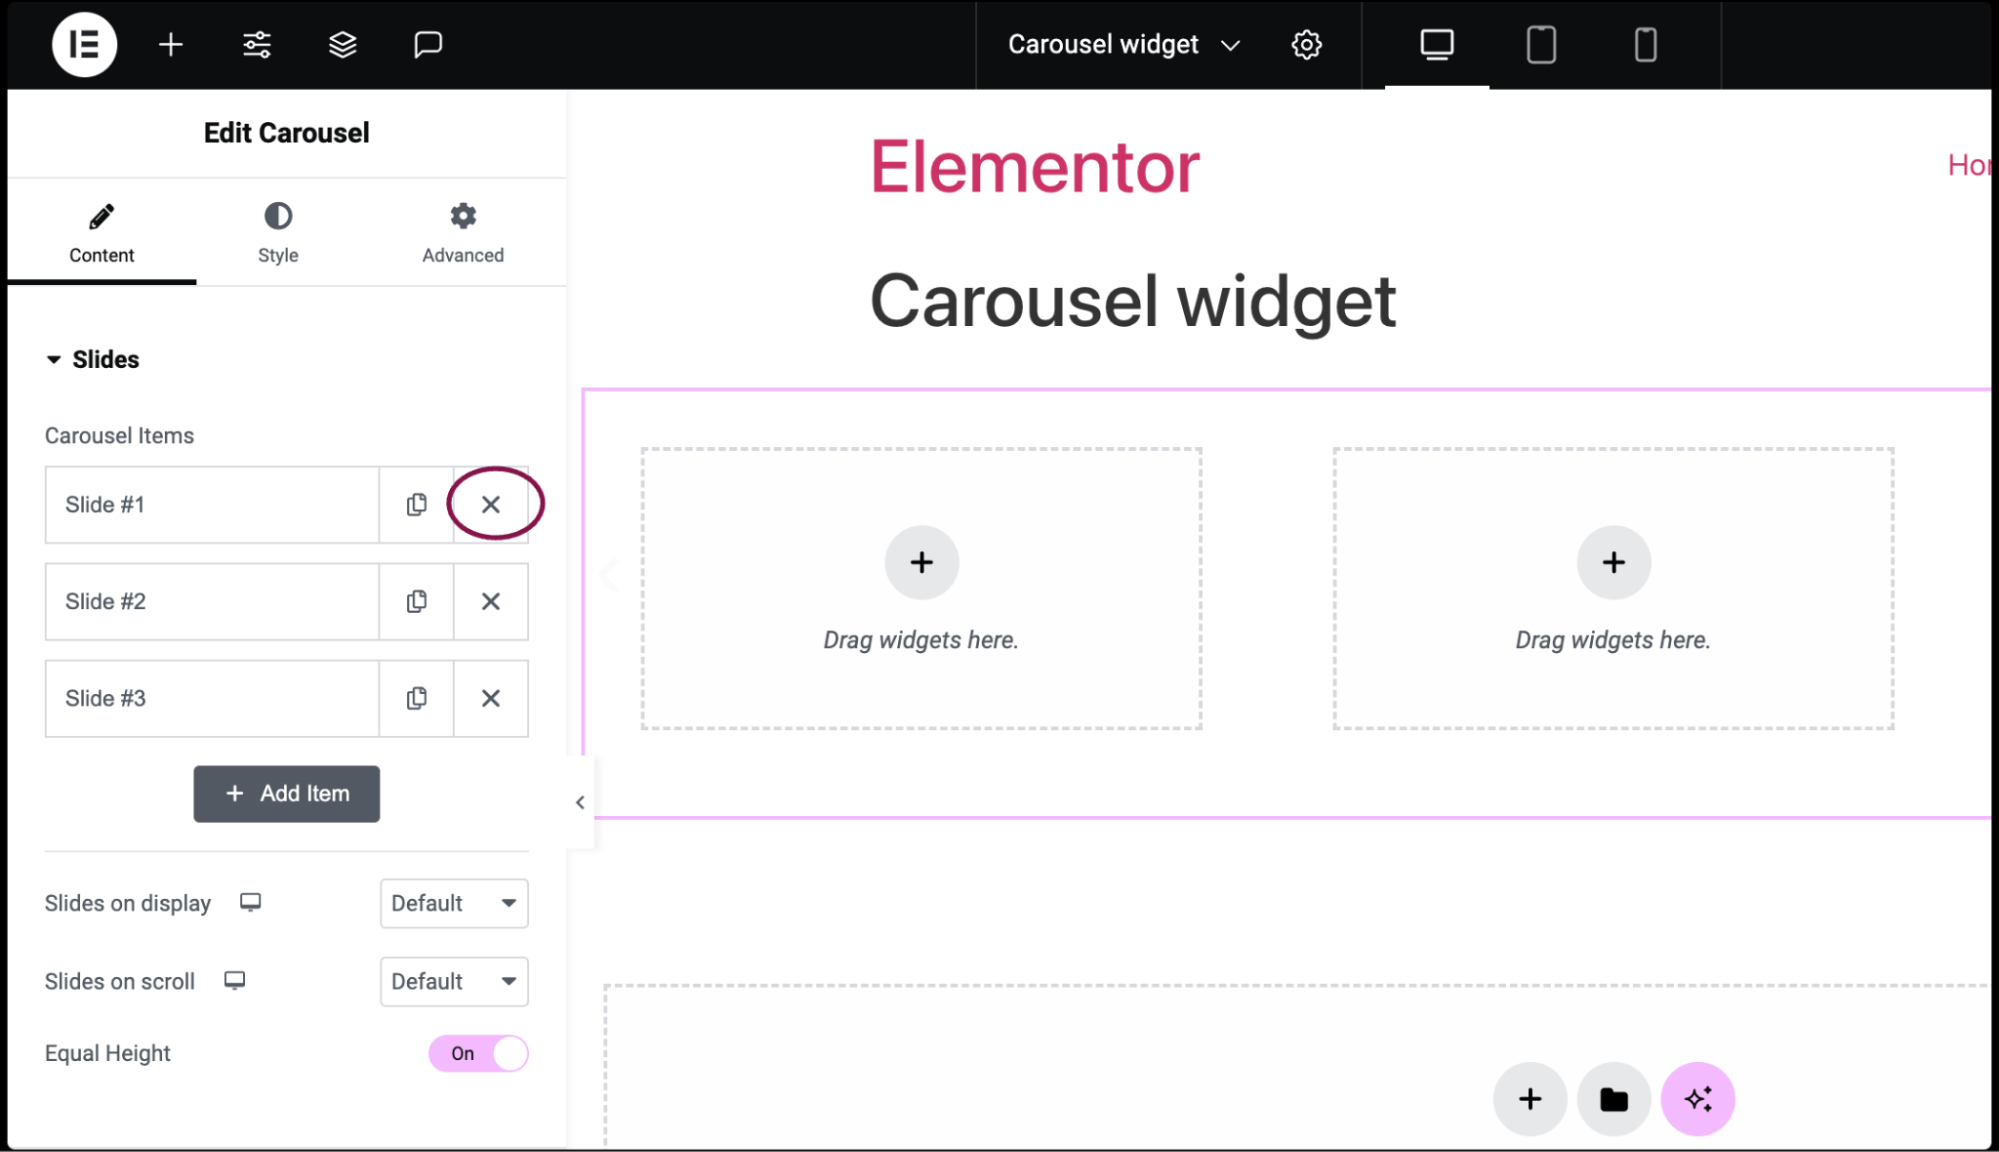
- Click the delete icon
 to delete a slide.
- To add a new slide, in the Content tab, under the Slides section, click the Add Item button. You can also create the exact copy of the existing slide by clicking the
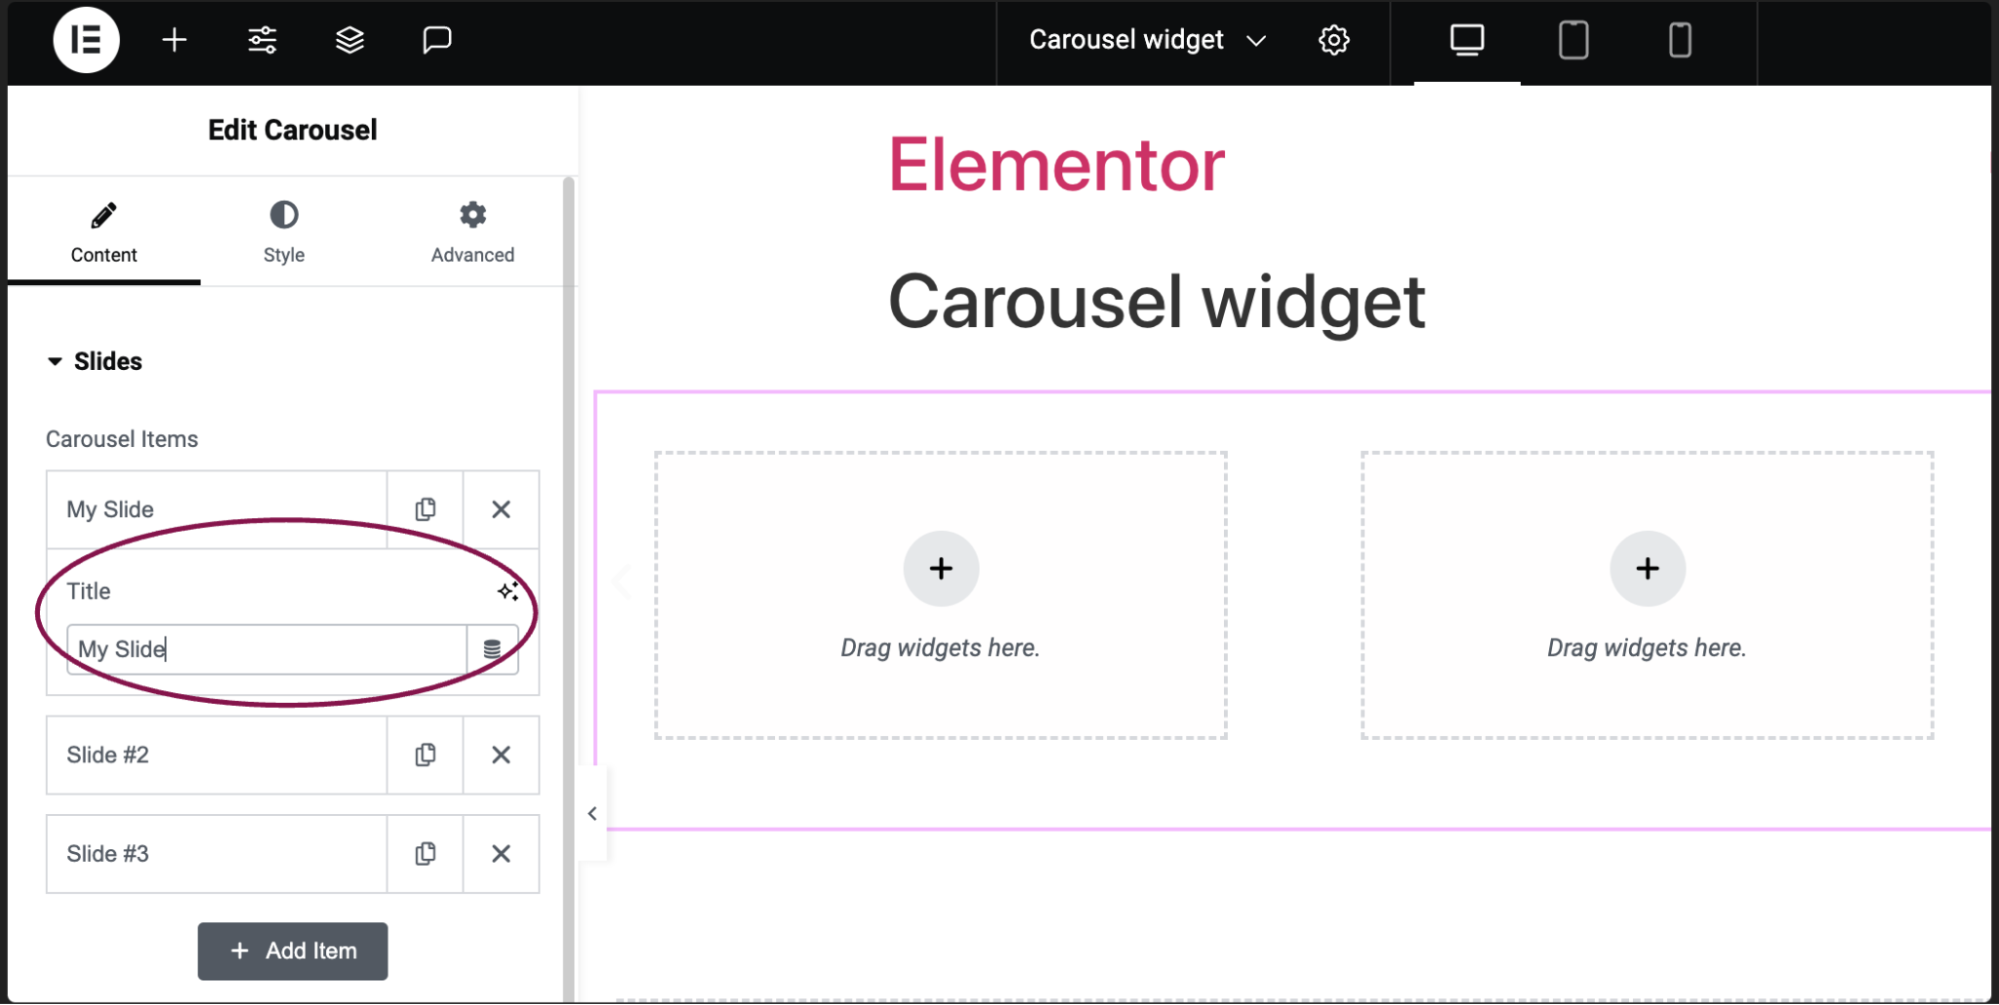
- (Optional) Click on the individual slide to change its Title.
- In the Slides on display field, from the dropdown menu choose the number of slides visible.
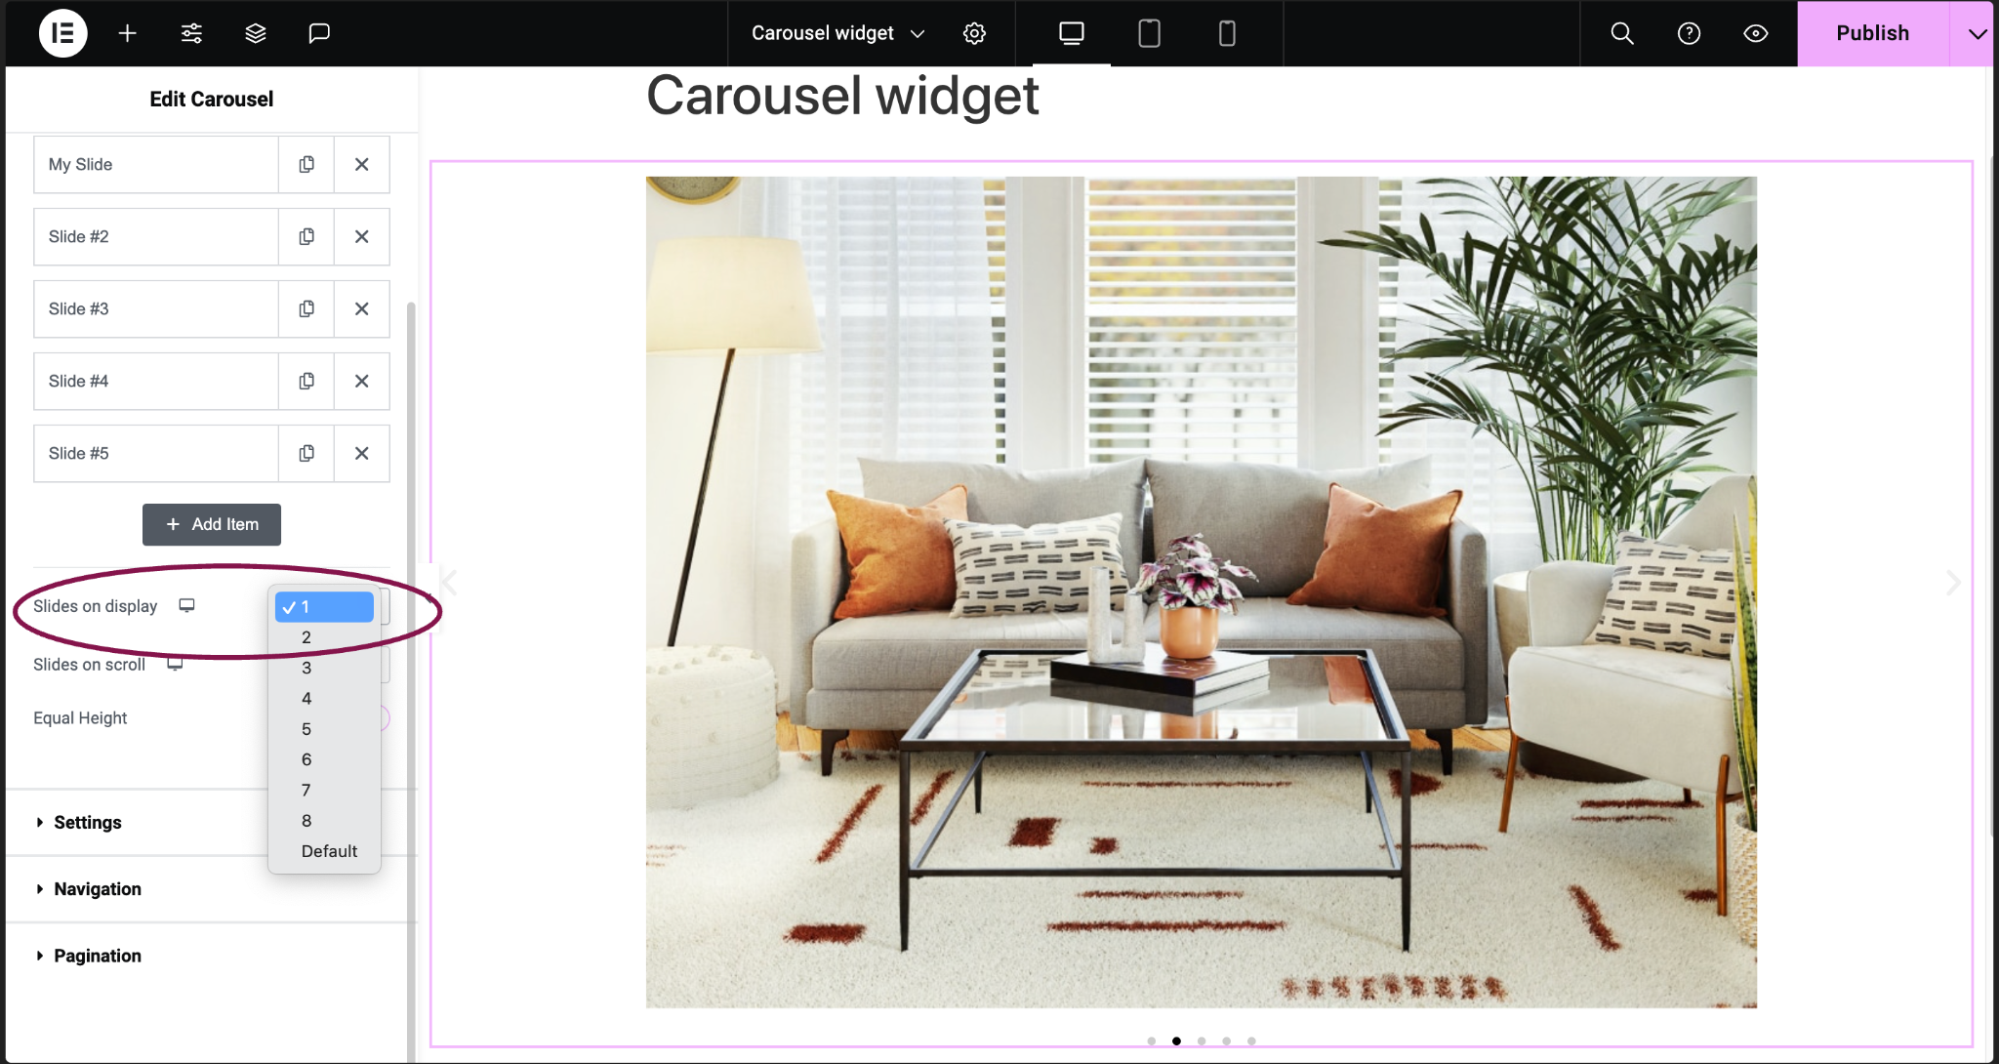
Note: The more slides you add, the smaller each slide will be. - In the Slides on scroll field, from the dropdown menu select the number of slides that will move when visitors click the navigation icon.
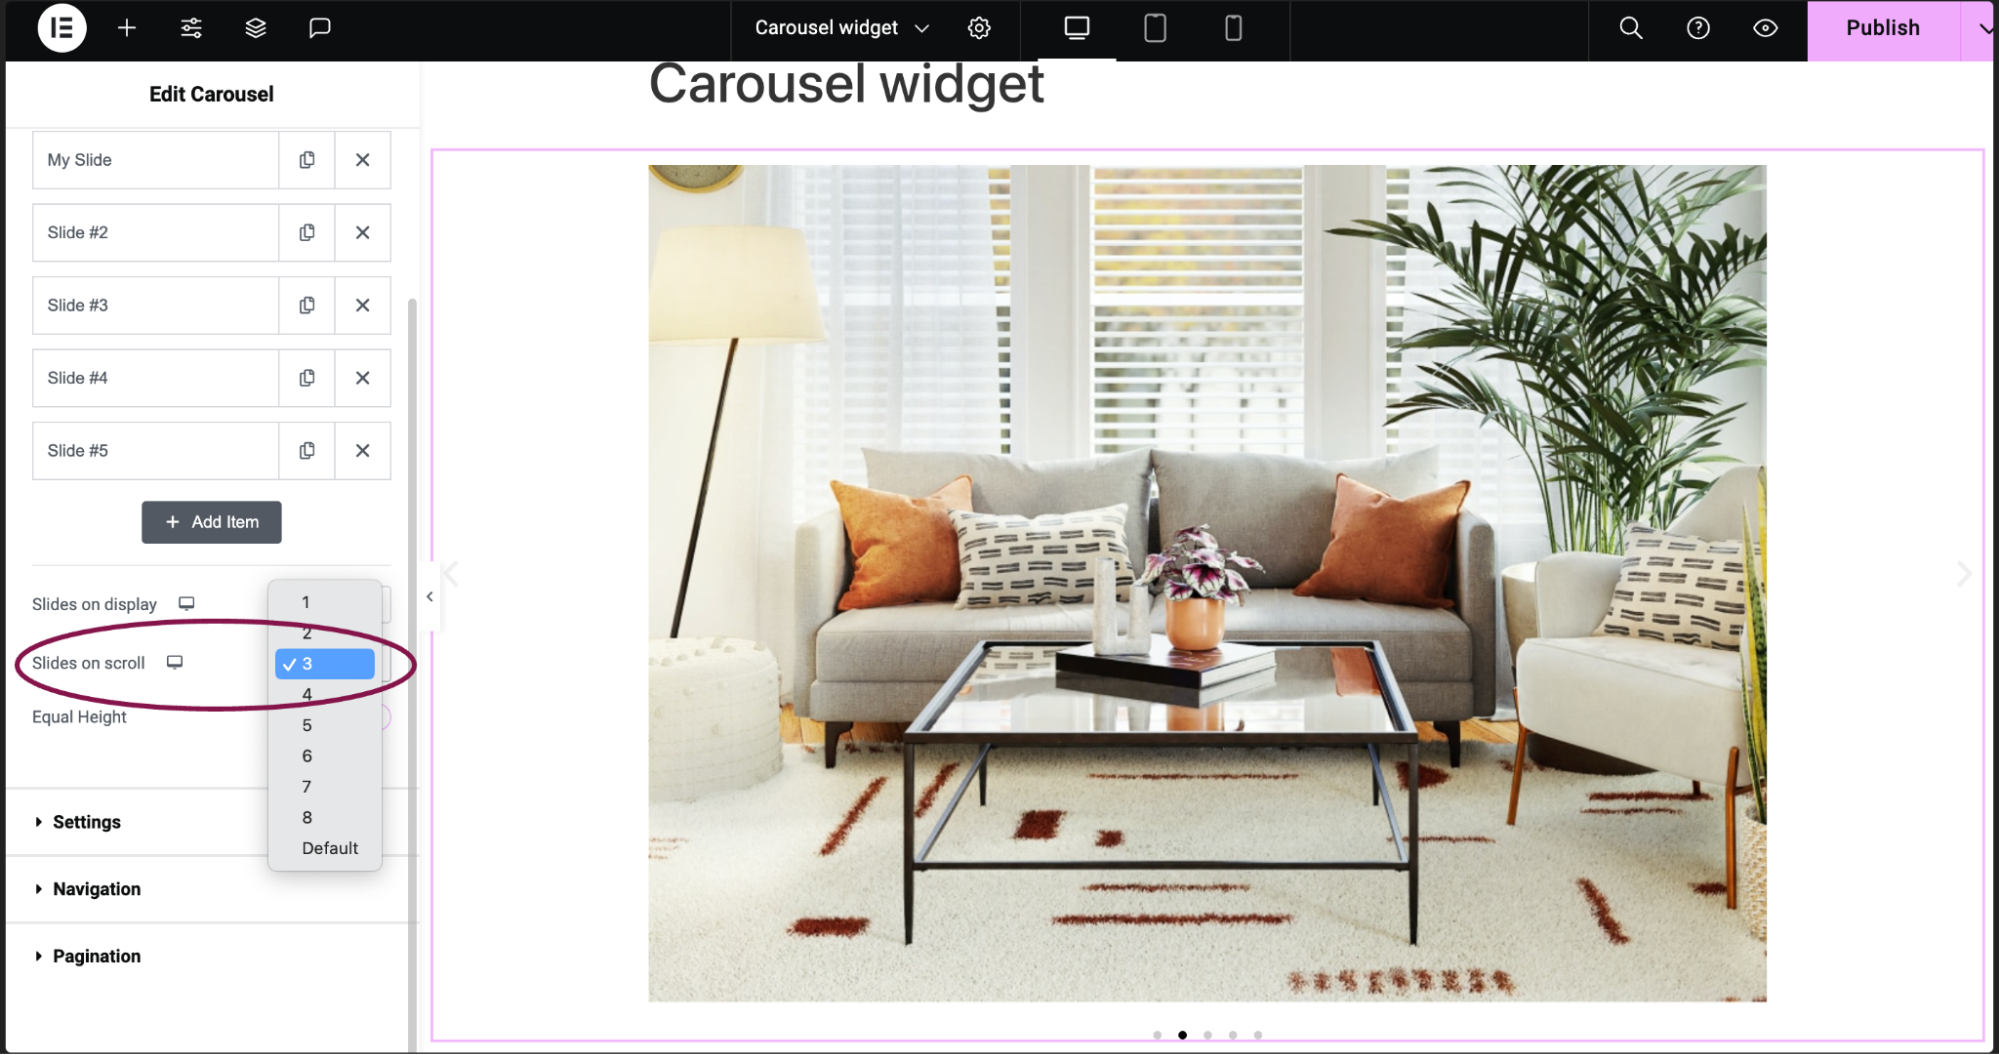
- Enable the Equal Height option to have all the slides the same height.
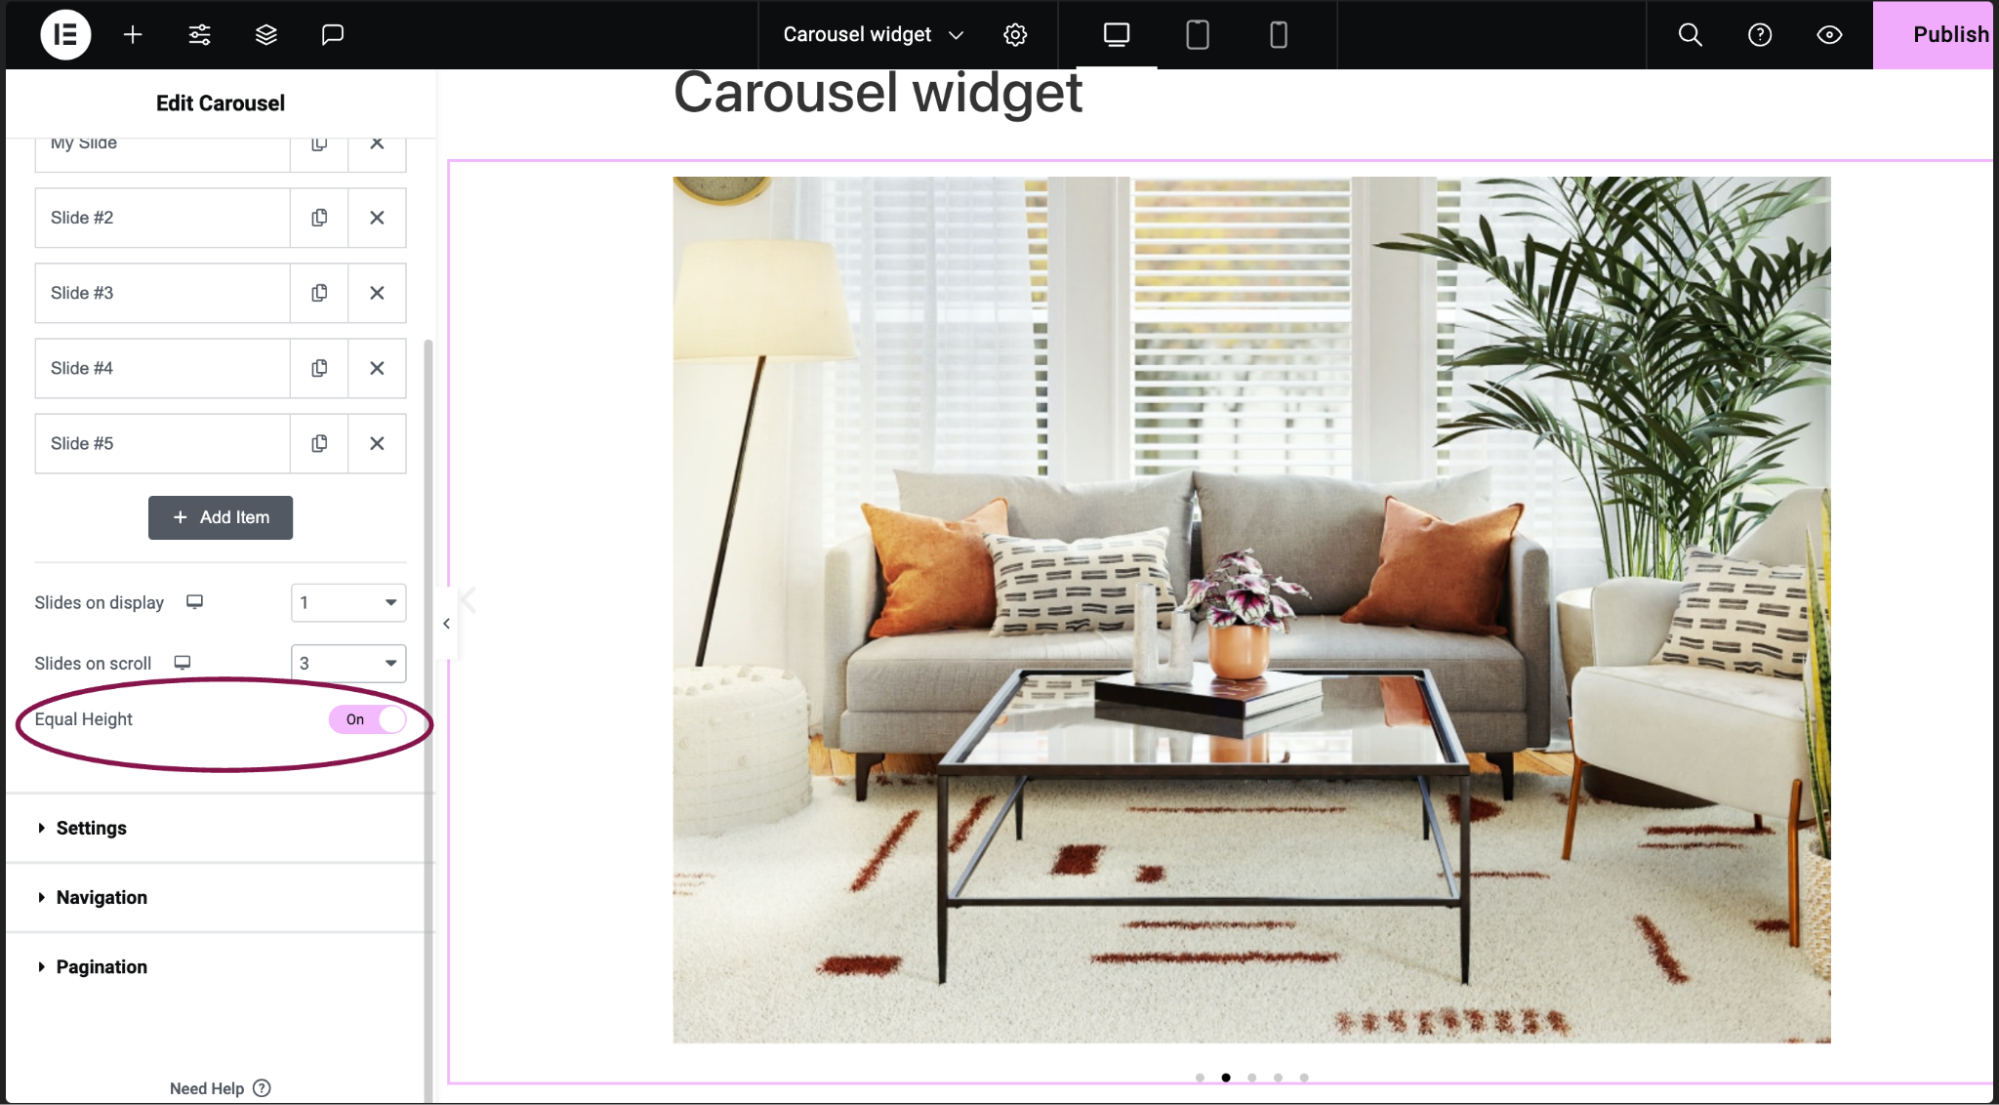
You can customize your widgets using content, style, and other advanced parameters, offering you great flexibility in tailoring them to your needs. Click the tabs below to see all the settings available for this widget.
In the Content tab, you can configure settings related to the content and functionality of the carousel, such as the number of visible slides, autoplay options, navigation controls, and pagination style.
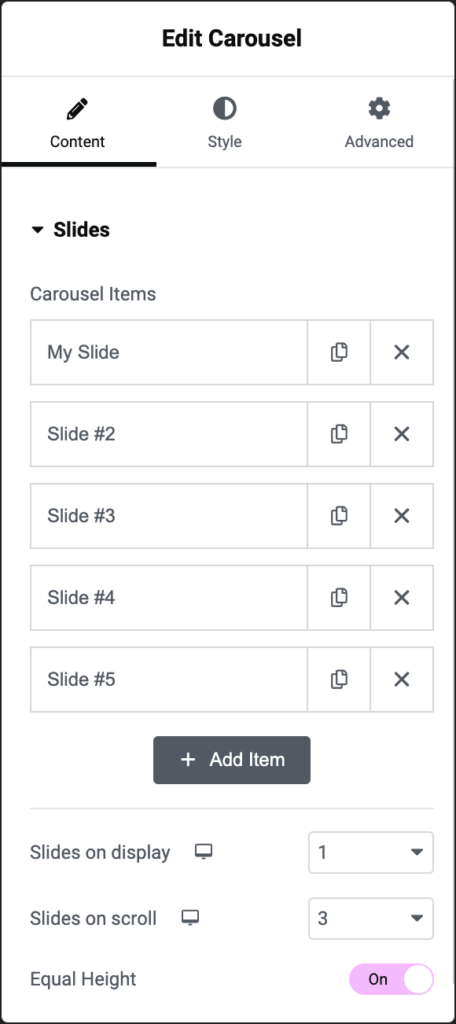
Carousel Items
Slides that make up the carousel.
- Click the icon
 to copy a slide.
 - Click the icon
 to delete a slide.
Slides on display
Controls the number of slides visible to visitors.
- Use the dropdown to determine the number of slides visible.
Note: The more slides you add, the smaller each slide will be.
Slides on scroll
Use the dropdown to determine the number of slides that will move when visitors click the navigation icon.
Equal Height
Determines whether all slides will be equal in height.
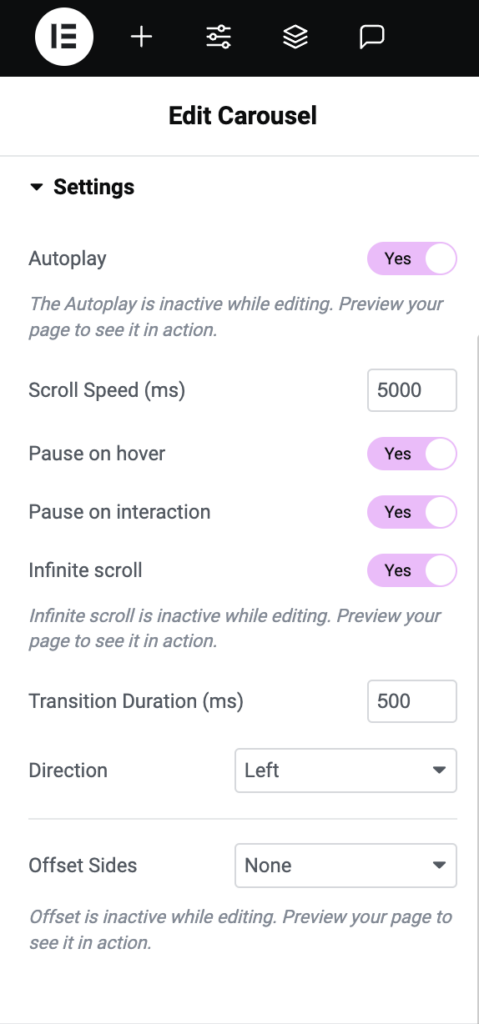
Autoplay
The carousel scrolls automatically while visitors are viewing the page. Slide the toggle to No to deactivate the Autoplay feature.
Scroll Speed (ms)
Controls how long each slide stays on screen before it automatically moves to the next one. Measured in milliseconds. Hidden if autoplay is turned off.
Pause on hover
Disables autoplay while visitors mouse over the carousel. Hidden if autoplay is turned off.
Pause on interaction
Disables autoplay when visitors click elements in the carousel. Hidden if autoplay is turned off.
Infinite scroll
Turn this toggle off to prevent the carousel from restarting after it reaches the last slide.
Note: Infinite scroll is inactive while editing and only works in preview mode or on a live site.
Transition Duration (ms)
The time it takes for one slide to replace another. Measured in milliseconds.
Direction
Choose a direction for the slide, such as left or right.
When setting the alignment to the Left, the first slide in the carousel will appear on the far left side. Conversely, when setting the alignment to Right, the first slide will be positioned on the far right side of the carousel.
Offset Slides
Determines the number of additional slides visible beyond the main visible slide.
- None: No additional slides will be visible.
- Both: Additional slides will be visible on both sides of the main slide.
- Left: Additional slides will be visible only to the left of the main slide.
- Right: Additional slides will be visible only to the right of the main slide.

Arrows
Arrows are the default navigation icon. By clicking the arrows, you manually move to the previous and next slides.
Toggle the button to disable arrows.
Previous Arrow
Icon – Replace the arrow icon used to view the previous slide:
 Select not to display an icon
  Upload an SVG file to use as an icon. See Enable SVG support.
  Choose an icon from the icon library.
Horizontal
- Orientation: Place the icon at the start, center or end of the Carousel.
- Position: Use the slider to place the navigation icon exactly where you want it. For more details, see Units of measurement.
Vertical
- Orientation: Place the icon at the top, center or middle of the Carousel.
- Position: Use the slider to place the navigation icon exactly where you want it.
Next Arrow
Icon – Replace the arrow icon used to view the next slide:
 Select not to display an icon
  Upload an SVG file to use as an icon. See Enable SVG support.
  Choose an icon from the icon library.
Horizontal
- Orientation: Place the icon at the start, center, or end of the Carousel.
- Position: Use the slider to place the navigation icon exactly where you want it. For more details, see Units of measurement
Vertical
- Orientation: Place the icon at the top, center, or middle of the Carousel.
- Position: Use the slider to place the navigation icon exactly where you want it.
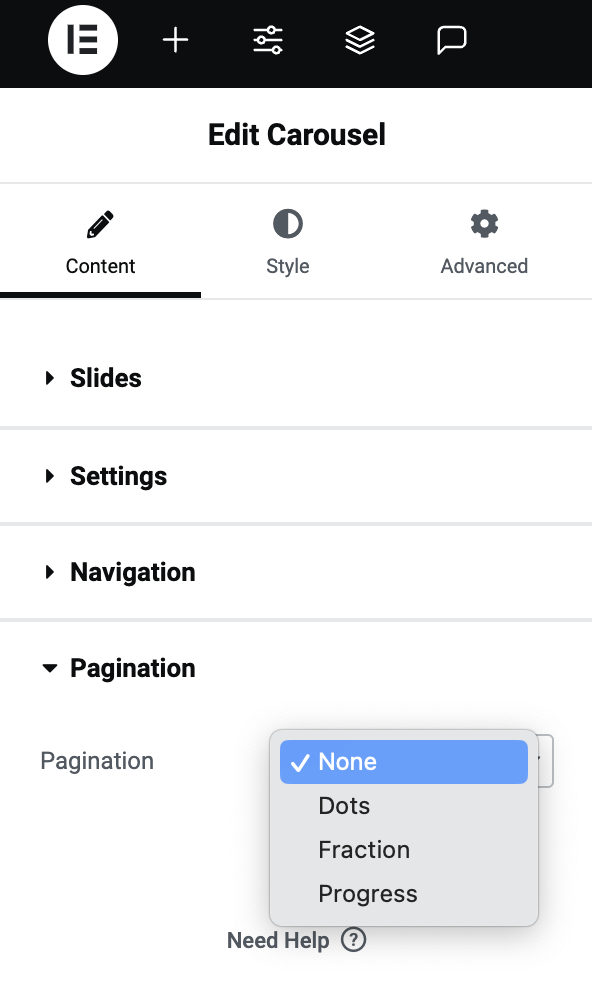
Pagination
Choose how to indicate the page number:
- a series of dots
- a fraction
- a progress bar
If you want, you can also turn the pagination off.
Note: In the Style tab the pagination style changes depending on what method of pagination you use here.
In the Style tab, you can customize the visual appearance of various elements within the carousel, including slides, navigation icons, and pagination indicators. You can adjust parameters such as spacing, background type, border style, padding, icon size, typography, and color.
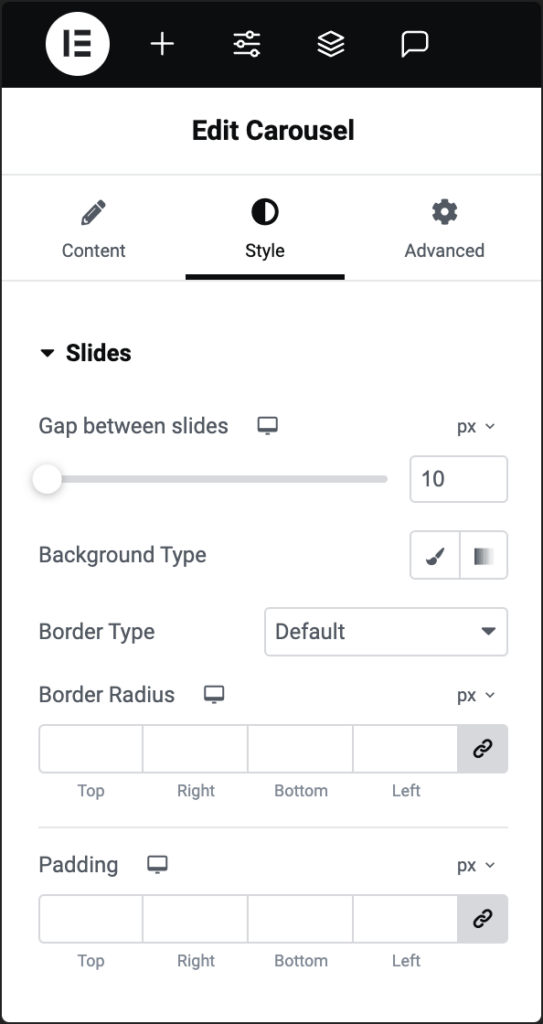
Gap between slides
Use the slider to adjust the amount of space between slides.
Background Type
Choose the background, for details, see Backgrounds.
Border Type
Choose the border, for details, see Border types.
Border Radius
Choose the border radius, for details, see Border radius.
Padding
Add padding, for details, see Padding and margins.
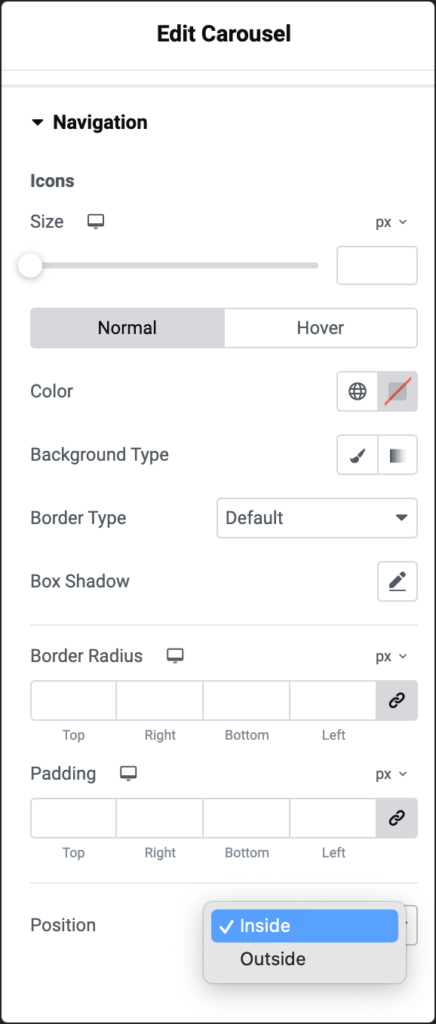
Icons
Use the slider or the counter control to adjust the size of the icons that you use to manually move to the previous and next slides. For more details, see Units of measurement.
Normal/Hover
- Normal: determine how the dots will appear by default.
- Hover: determine how the navigation appears when you visitors mouse over them.
Color
Choose a color: either use the color picker or a global color.
Background Type
Choose the background type for the navigation arrows. For details, see Backgrounds.
Box Shadow
Click the 🖋️ icon to add a shadow to the arrows. Learn more about shadows.
Border Radius
Choose the border radius, for details, see Border radius.
Padding
Add padding, for details, see Padding and margins.
Position
From the menu, determine if the navigation icons appear Inside or Outside the carousel.
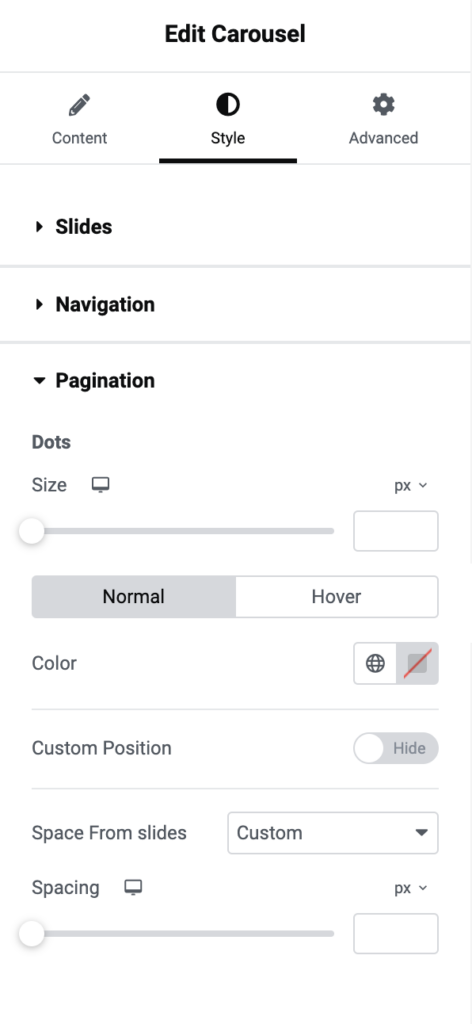
Dots
Represent the pages in your carousel by using dots positioned below the carousel.
Size
Use the slider or the counter control to adjust the size of the dots representing the pages. For more details, see Units of measurement.
Normal/Hover
- Normal: determine how the dots will appear by default.
- Hover: determine how the dots appear when you mouse over them.
Custom Position
This option allows you to choose exactly where the dots appear within the carousel layout.
- Horizontal Orientation & Position: Allows you to control the placement of the dots along the horizontal axis. For example, you can choose to align the dots to the left, center, or right side of the carousel, or even specify an exact distance from the edges of the container.
- Vertical Orientation & Position: Allows you to control the placement of the dots along the vertical axis. Align them to the top, middle, or bottom of the carousel, or specify a precise distance from the top or bottom edges.
Space From Sliders
Use the slider or the counter control to adjust the amount of space between the dots and the slides. For more details, see Units of measurement.
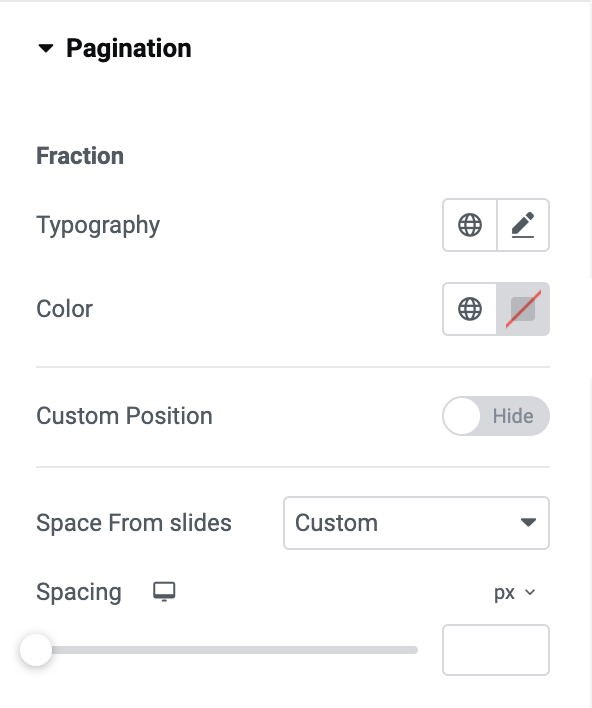
Typography
Choose how your fractions will appear to visitors. For details, see Typography.
Color
Choose a color: either use the color picker or a global color.
Custom Position
This option allows you to choose exactly where the fractions appear within the carousel layout.
- Horizontal Orientation & Position: Allows you to control the placement of the fractions along the horizontal axis. For example, you can choose to align the dots to the left, center, or right side of the carousel, or even specify an exact distance from the edges of the container.
- Vertical Orientation & Position: Allows you to control the placement of the fractions along the vertical axis. Align them to the top, middle, or bottom of the carousel, or specify a precise distance from the top or bottom edges.
Spacing From Slides
Use the slider or the counter control to adjust the amount of space between the fractions and the slides. For more details, see Units of measurement.
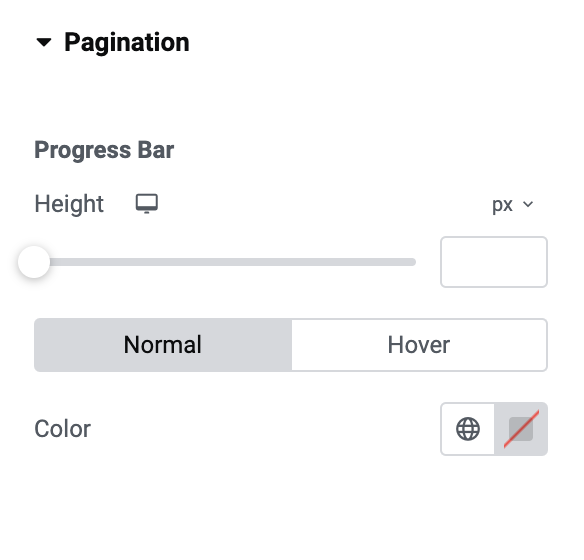
Height
Use the slider or the counter control to adjust the width of the progress bar. For details, see Units of measurement.
Normal/Hover
- Normal: determine how the progress bar will appear by default.
- Hover: determine how it will appear when visitors mouse over them.
Color
Choose a color: either use the color picker or a global color.
The Advanced tab provides options to control carousel position, adjust spacing, add custom code, and more.
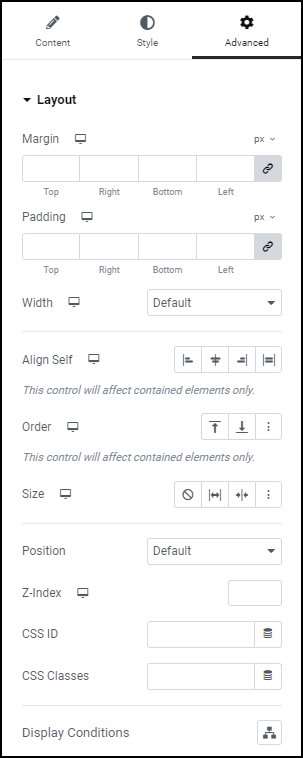
Advanced
Learn more about the Advanced tab settings.